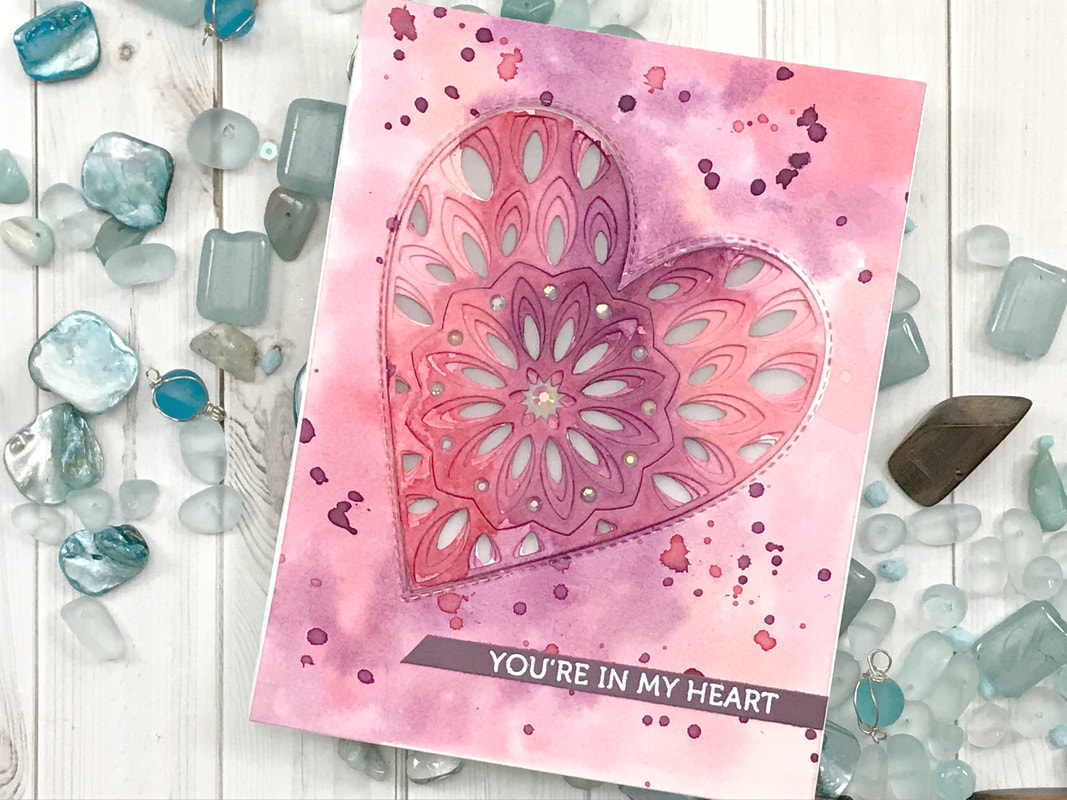
 Hello Everyone! Today I am back with another design team project for Birch Press Design! Let's work on those last Valentine’s Day cards we need to get done! Yes I am always late making my cards... LOL The Kaleidoscope Layering Die has become one of my many favorites from the recent Birch Press Design Release! For this card I started out with all my die cutting of my heart. The card stock I used is a watercolor card for all my pieces, even the heart! Once all my pieces were glued together using my liquid adhesive I set my Kaleidoscope Heart aside to dry. I then used the largest die from the Stitched Heart Die Set to cut out a section of my background panel. I grabbed my cutting board to tape down my watercolor paper and picked out my brush and pallet! 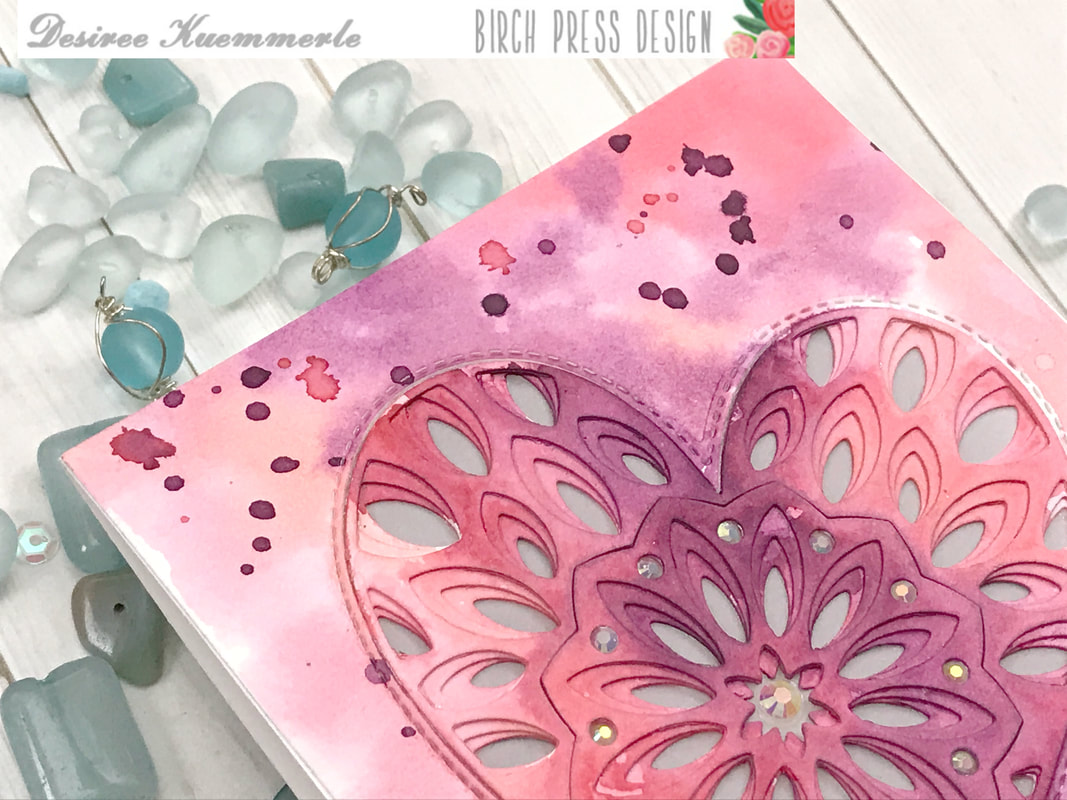 I chose my Distress Inks in shades or Pinks, Reds and a splash of purple and placed some ink down onto my pallet. Spraying my water color paper with my mister I then added my color on my panels. Have fun with this and just drop away making sure the colors will blend together. Once I had my first layer down I removed my Heart from the center and set aside my background panel to dry. I wanted this to have a soft shade of all the colors! I then placed my heart back onto my cutting board for another layer of watercolor.  Using the same colors, I added another layer to intensify the shades on the heart only. It was interesting to see the watercolor go into the layers of the hearts and pool into the cracks of the paper! I removed this from my board and set aside to dry. Yes, I cheated and used my heat tool to speed up the process! I attached my background panel to my standard A2 size card base so I could re-position my stitched heart die to cut through, this way we had an opening on the front of our card where our heart will be placed. I was thinking about my focal point and the backside and decided to cut one more of Layer C from the Kaleidoscope set from my water color paper and also a piece of vellum. 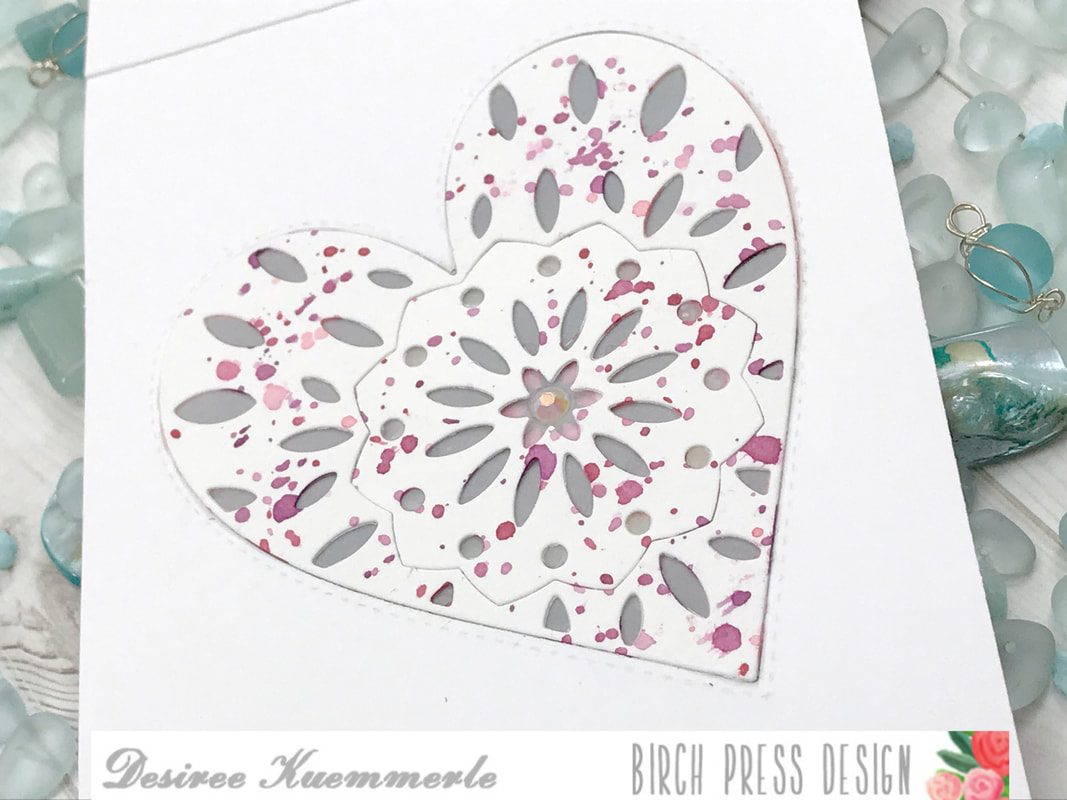 I placed this section onto my board and used the same color but only for splattering. The beauty of this die is they can be placed again each other on each side! Now it is finally time to put our card together! Using my liquid adhesive, I placed my vellum in between my two heart panels and made sure I had glue around the edges and placed into the opening in my background and card base. I know it may sound confusing and difficult but trust me, it is not and plus I always have a video! 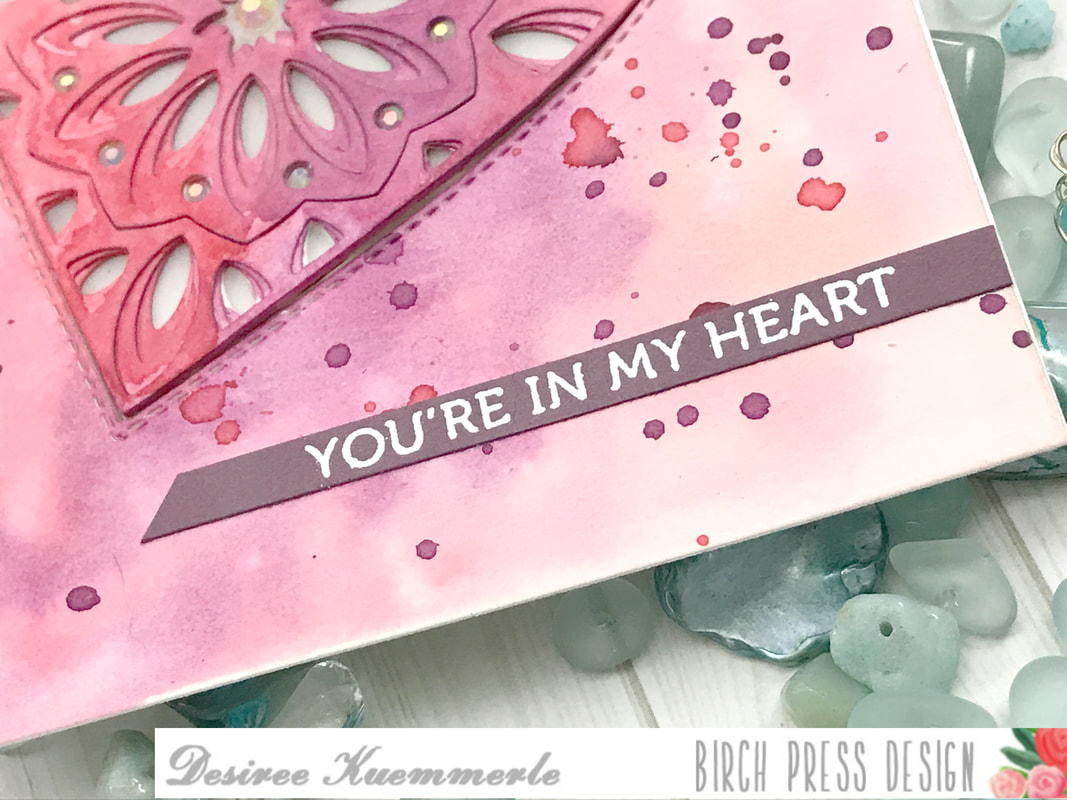 I used a sentiment from the Lingo Thanks Clear Stamp Set and cut into a thin strip and set it towards the bottom of my card! It will be great surprise when the card is open you get a beautiful pop of color! Just some of the products used for this project today!... Birch Press Design – Lingo Thanks Birch Press Design – Kaleidoscope Heart Layering Dies Birch Press Design – Stitched Heart Dies Spun Sugar Festive Berries Abandoned Coral Seedless Preserves Pretty Pink posh – Ivory Gems To see each craft step in detail, just click on the video below! When you are done watching the video, and want to see more, CLICK HERE to go to my YouTube Channel ...
Don’t’ forget to LIKE and SUBSCRIBE to my channel! Always Remember... Be Inspired, ENJOY, LAUGH and ALWAYS BE CREATIVE! ~ Desiree
0 Comments
Your comment will be posted after it is approved.
Leave a Reply. |

Getting Inky, suffering paper cuts, cutting using metal dies and stamping everything... These are just some of the fun and mischievous ways together we will create paper art! So stay and be motivated and inspired! ...and let me know what inspires your creativity!


Designer/Owner/Creator - Desiree
Well, hello there everyone! My name is Desiree Kuemmerle and I live in Lansdale, PA with the hubs of over 20 years and our furry bot Max! I am fluent in Crafting, a Master Paper Manipulator and a violator of all that makes sense...
Since about the time I spoke my first word, I’ve been an avid crafter alongside my mom and sister. You name the craft and I’ve probably bought it, collected it, tried it and finally stored it. Right now, getting Inky, suffering paper cuts, cutting with metal dies and stamping everything, whether it moves or not makes me smile and I must pass that along to everyone I know and don’t know! 
Inspiration Crafty Designs for...
 
DESIGN TEAM
Just a few Great places for all your CRAFTY needs!!!
 
Old Posts Never Die
November 2022
Search by Categories
All
|
 RSS Feed
SEARCH WEBSITEServiceslet's connect SOCIALLY! |
|
copyright!All content and designs included on my sites, social media and e-commerce webpages (i.e. Etsy, Facebook, ONLINE Courses and Website Store) are under COPYRIGHT © Desiree Kuemmerle, Include a Thank You, Desiree Tangles with Paper and Desiree Kuemmerle, CZT. Original artwork and designs are shared for your personal creations and inspiration only, unless otherwise stated by Desiree Kuemmerle.
© COPYRIGHT 2017-2024. by Desiree Tangles with Paper and (a.k.a.) Include a Thank You ...and then some! - Desiree Kuemmerle ALL RIGHTS RESERVED.
Include a Thank you
|