 Hello Everyone! I am here today with a design team project for Rubber Stamp Tapestry! Valentine's Day is fast approaching so this is a perfect opportunity to create a card using the Tapestry Hearts Peg Stamp Set! Go get many choices within this set - a heart, flower, vine and a branch! 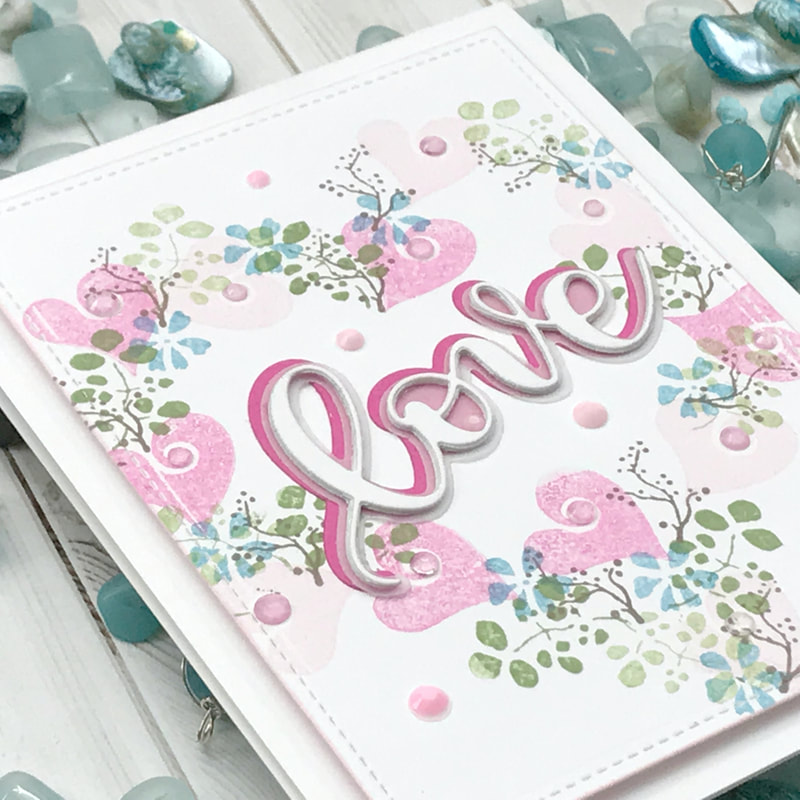 Not sure if it is a habit or... OK it is a habit that I developed! LOL When I create a card using my peg stamp I must also grab for me memento dew drop ink pads... It's like peanut butter & Jelly! 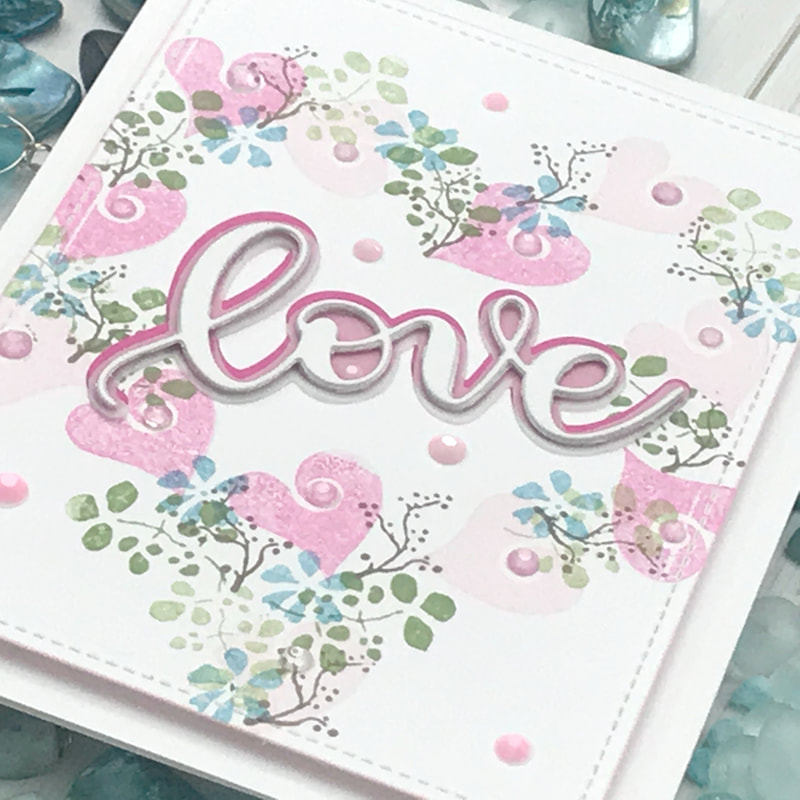 I stamped my images in the shape of a heart and then added a die sentiment for the final touch! Just some of the products I used in today's project... Peg Stamp Set – Tapestry Hearts Lawn Fawn Stitched Rectangle Die SSS Love Sentiment Die Set Memento Ink Dew Drop Sets – SNOW CONE 12 ink set Memento Ink Dew Drop Sets – GUM DROPS 12 ink set Memento Ink Dew Drop Sets – SORBET SCOOPS 12 ink set Interested in single Memento Dew Drop Ink Pads? CLICK HERE! Check out all the craft details below! When you are done watching the video, and want to see more, CLICK HERE to go to my YouTube Channel ...
Don’t’ forget to LIKE and SUBSCRIBE to my channel! Always Remember... Be Inspired, ENJOY, LAUGH and ALWAYS BE CREATIVE! ~ Desiree
1 Comment
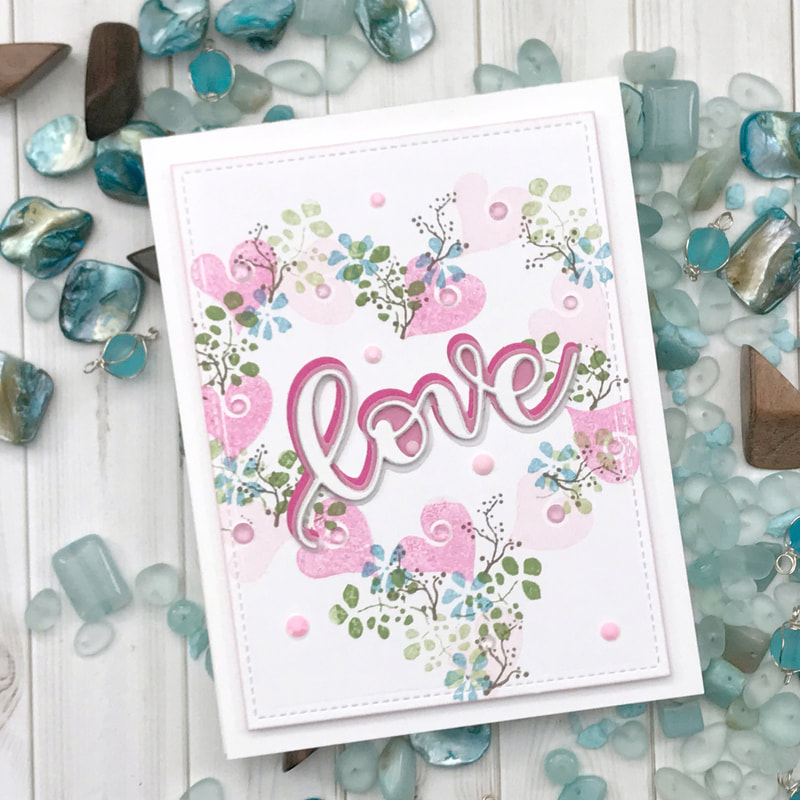
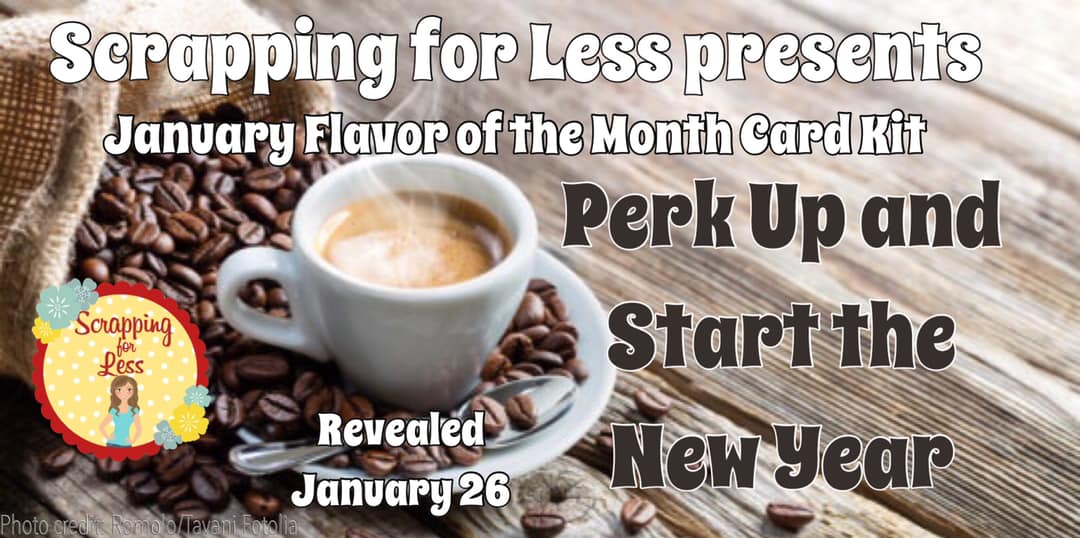 Hello Everyone! Let’s “Perk Up and Start the New Year” with Scrapping for Less's January Flavor of the Month Card Kit! I have a little story to tell…I never drank coffee until I retired about 6 years ago from teaching school…cause who wants a cold cup of what is supposed to be hot coffee? So now…with my wonderful flavored creamer I enjoy a cup of coffee every morning and especially love drinking my coffee while watching crafty videos on YouTube…so sit back and take a look at our Coffee themed FOTM blog hop this month. If you have not already snagged your kit please head over to the Flavor of the Month page and scroll down to choose the level of kit you would like! Make sure you click on the links below to get your kit and stay connected! FLAVOR OF THE MONTH CARD KIT DOWNLOADS BLOG SHOP Let's get to some inspiration! Here are three cards I made from the kit! Stop by my YouTube Channel to see more! 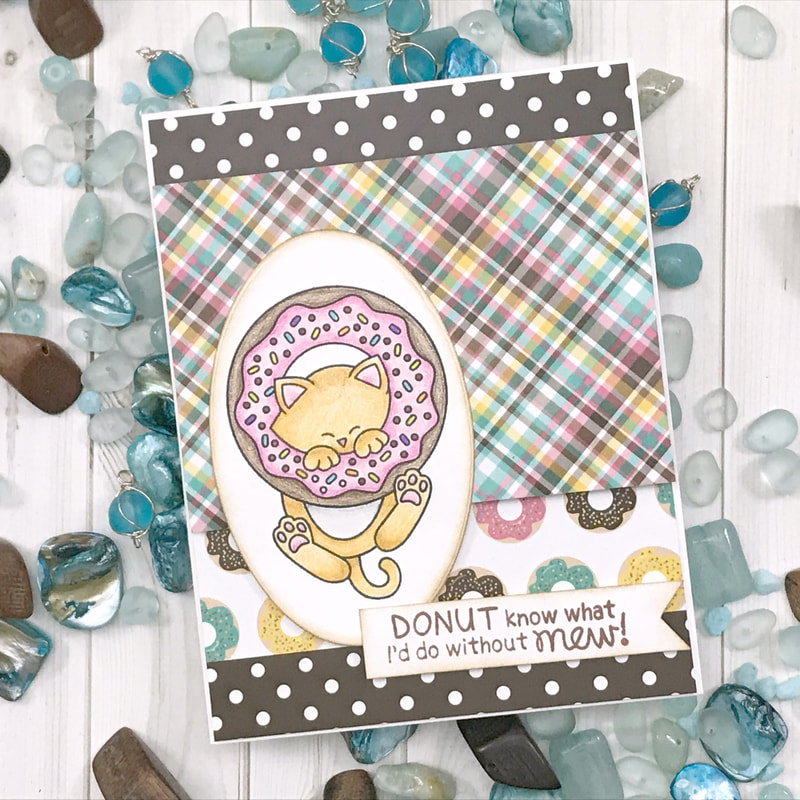 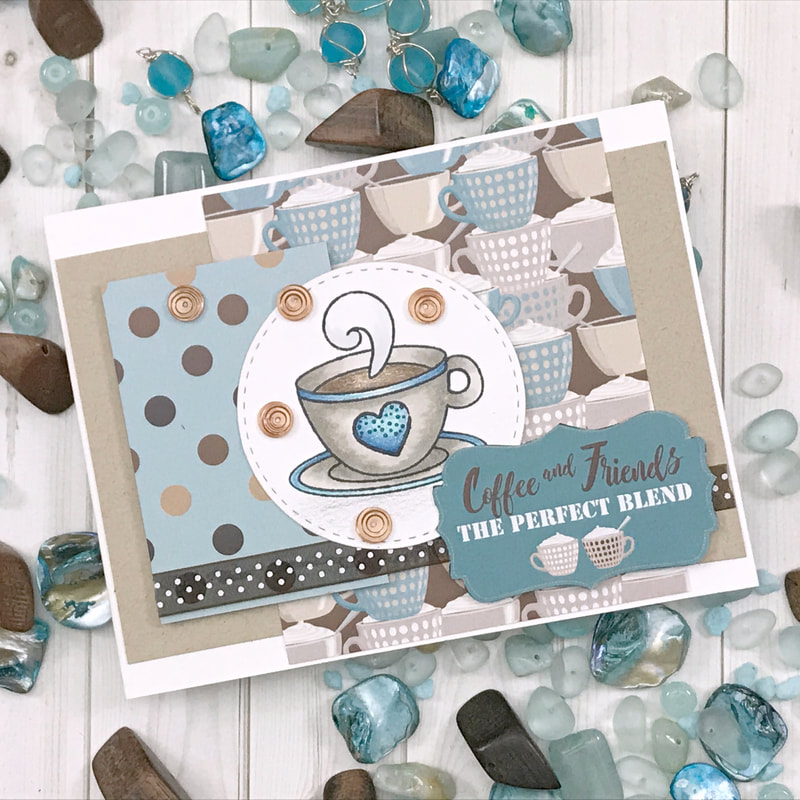 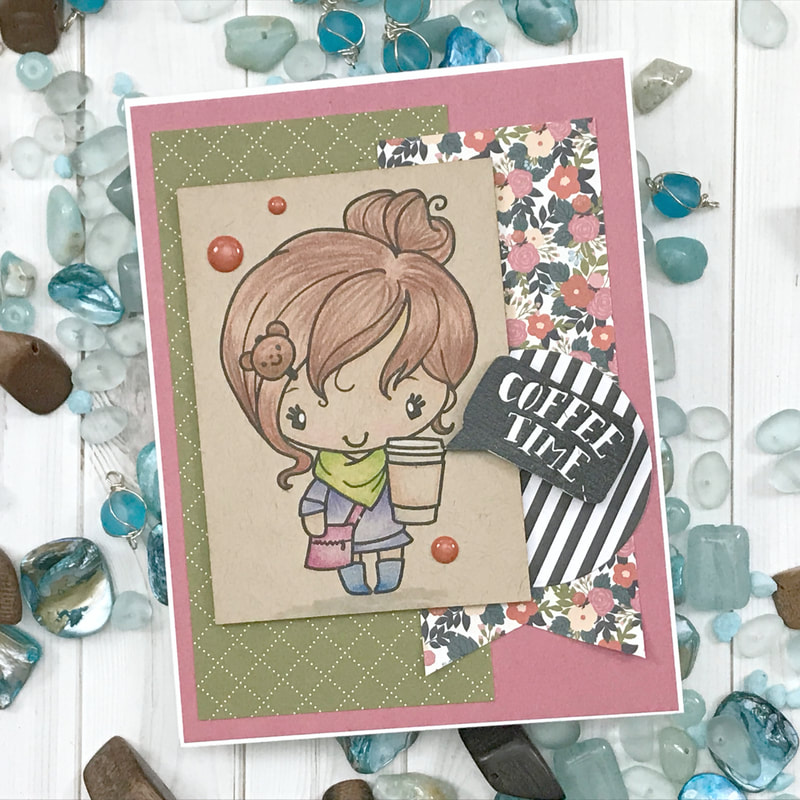 Let's see what you will get in your Scrapping for Less Flavor of the Month Card Kit for January 2019!  Double Dip Subscription 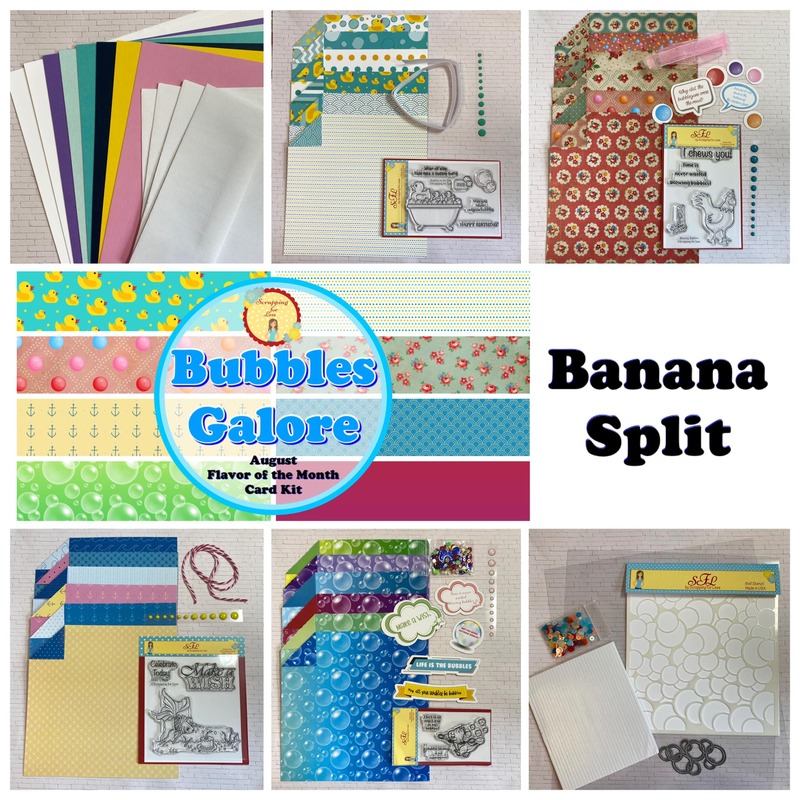 Banana Split Subscription OK now let's get ready to hop along and see some wonderful inspiration! SFL Blog Crystal Lynnea Katie Stacy LeeAnn Courtney It's ME <---> YOU ARE HERE! GUEST DESIGNER: Amy Tsuruta GUEST DESIGNER: Kimberly Wiener GUEST DESIGNER: Kathy Schweinfurth GUEST DESIGNER: Kristie Marcotte Christine Make sure you also put your name in for that Rafflecopter prize! Thanks again for hopping with us, and Happy Crafting! But Always Remember...
Be Inspired, Be Creative, ENJOY and SHARE what you create today! ~ Desiree 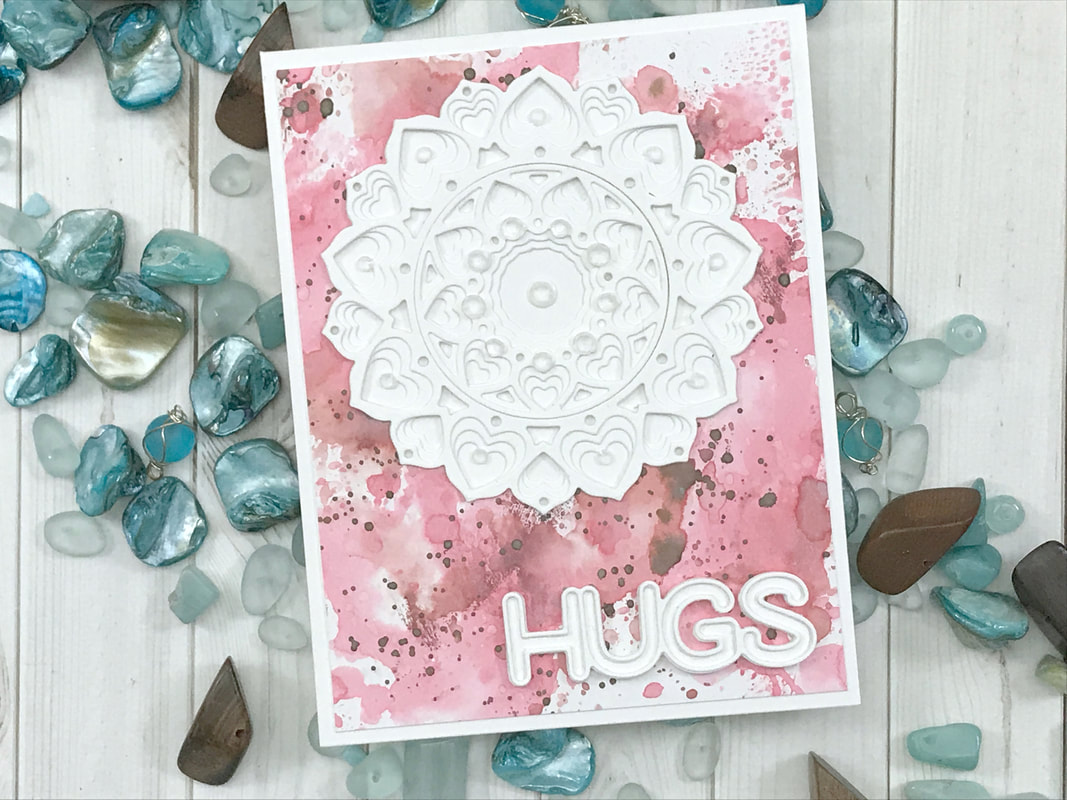 Hello Everyone! Today I am back with another design team project for Birch Press Design PLUS a GIVEAWAY! How exciting! Valentine’s Day is right around the corner and Birch Press has designed a great release to celebrate! The Adora Layering Die set is perfect to show someone how special they are with all the hearts to go around! 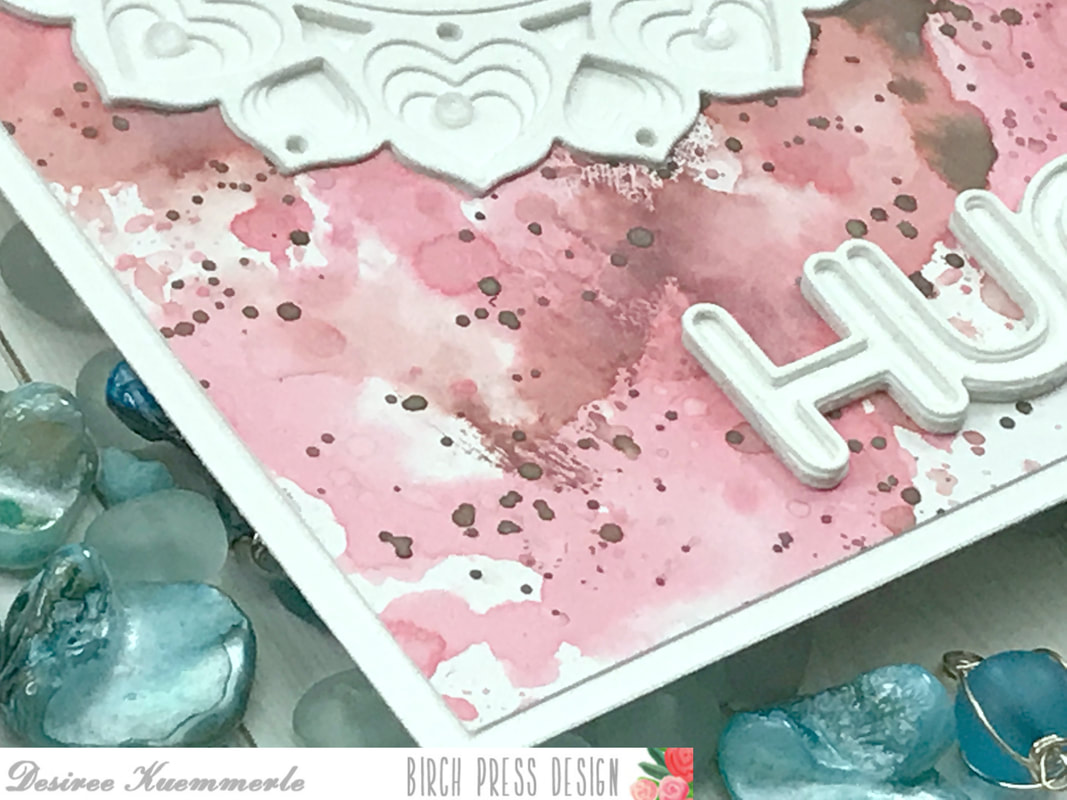 I knew I wanted to create a distress oxide background, so I grabbed three of my favorite colors and had fun ink smooshing onto my bristol cardstock! I started with my worn lipstick and then used my aged mahogany. For some final touches I added some ground espresso splatters… because when does a background not need those right? Once that was completed I set it aside so it could dry. 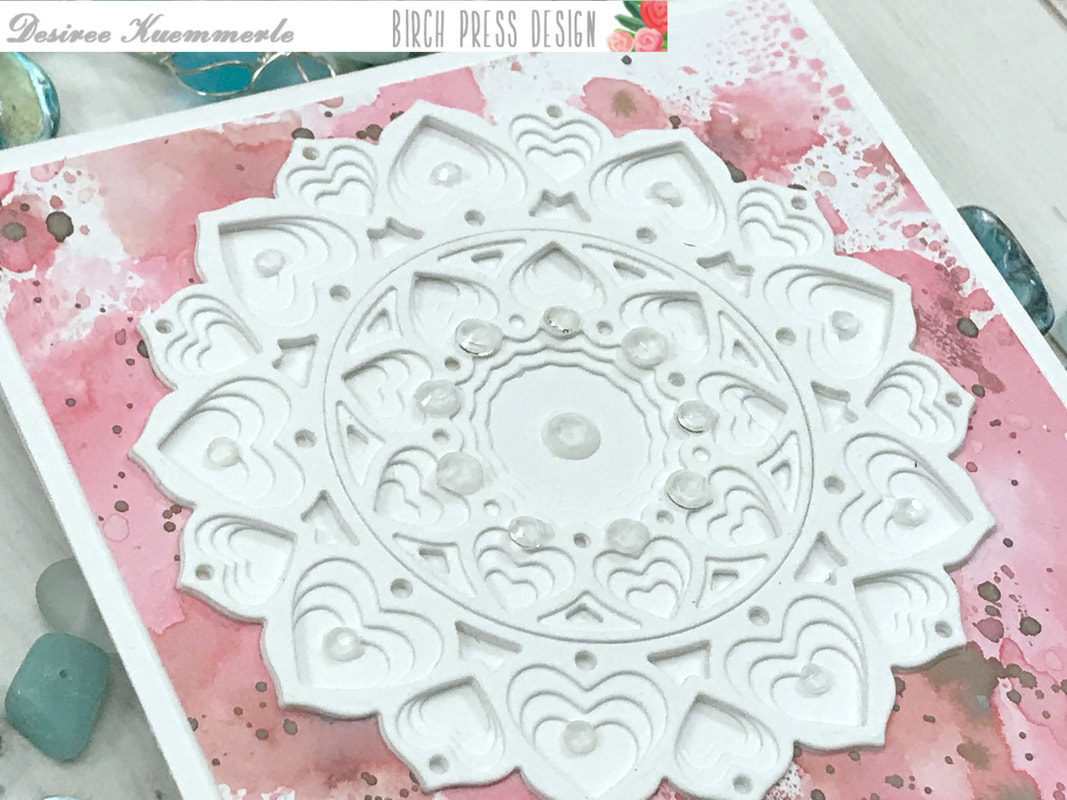 Now to all the die cutting! I used my white card stock and cut each of the Adora layers and three sets of my sentiment, we will get to that shortly! Once all my die cuts were completed I layered then all together starting with layer B onto layer C and finally layer A onto B and C. I then used one of the dies to create a cut out in my background. 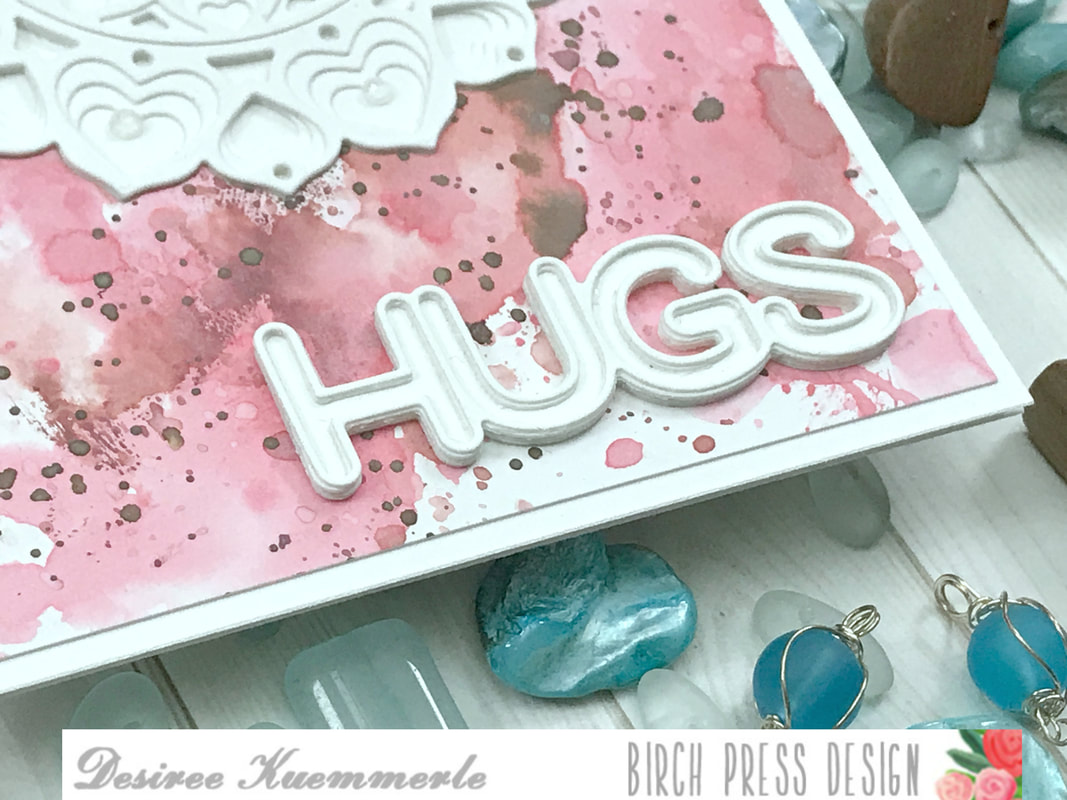 For my sentiment I used the Big Lingo Type HUGS die. What I love about this die set is you have options… You get three ways to give HUGS! An outline, solid, or just the letters, what could be better! I layered three of the solid of the sentiments together and then added two of the outlines to the top of the base. I love this look and the possibilities are endless on how you could dress this sentiment up! I grabbed my liquid adhesive and adhered my background panel to my standard A2 size card base and then set my Adora Mandela in the cut out. I love this look… These dies create an illusion to the eye, is the focal point going into the card or coming out of the card?... I then adhered my sentiment to the bottom right hand corner. GIVEAWAY DETAILS!!!!Go to the Birch Press Design BLOG and ENTER! Just a few of the products I used in this project... Birch Press Design – Big Lingo HUGS Birch Press Design – Adora Layering Die Set Click on the video below to see all the crafty details! When you are done watching the video, and want to see more, CLICK HERE to go to my YouTube Channel ...
Don’t’ forget to LIKE and SUBSCRIBE to my channel! Always Remember... Be Inspired, Be Creative, ENJOY and SHARE what you create today! ~ Desiree 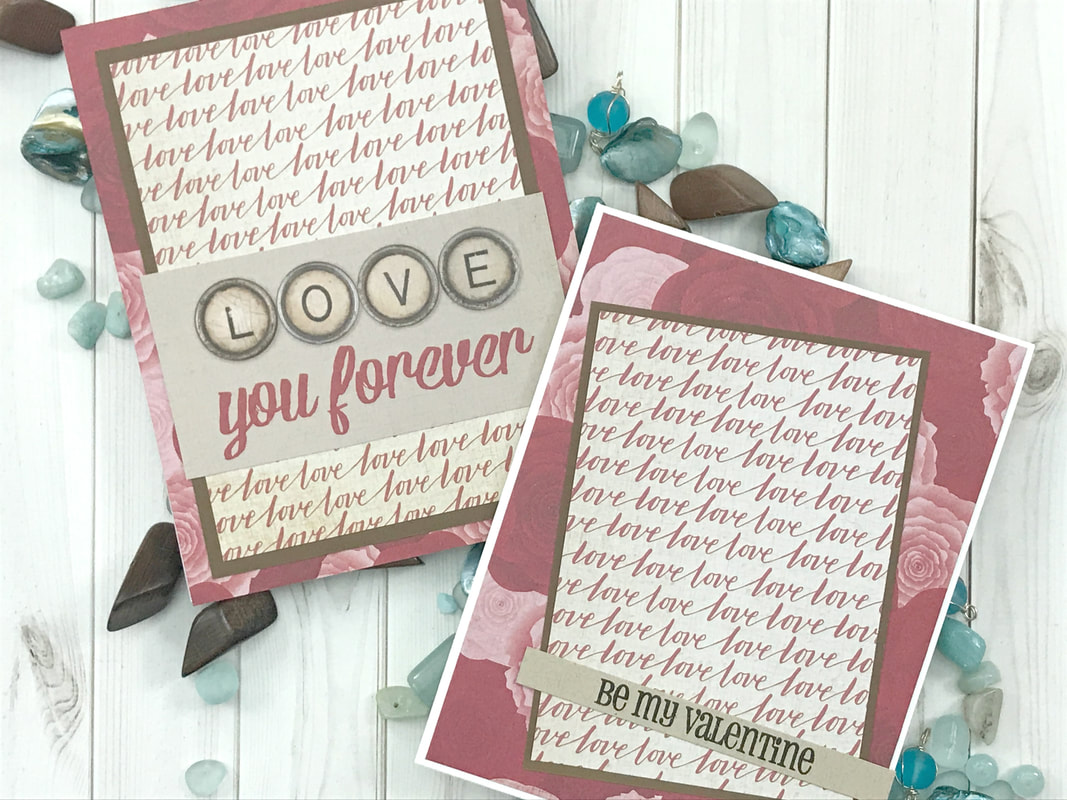 Hello Everyone! I am back today to show another Episode in my Simplicity Card Making Series! We are up to Episode 9! Remember, we do not need to have all the fancy tools and gadgets to make beautiful cards anyone would cherish! We just need scissors, pattern paper, adhesive, maybe a stamp set and ink but the most important item we need is our own imagination! So let's get back to the basics and create dome beautiful cards! 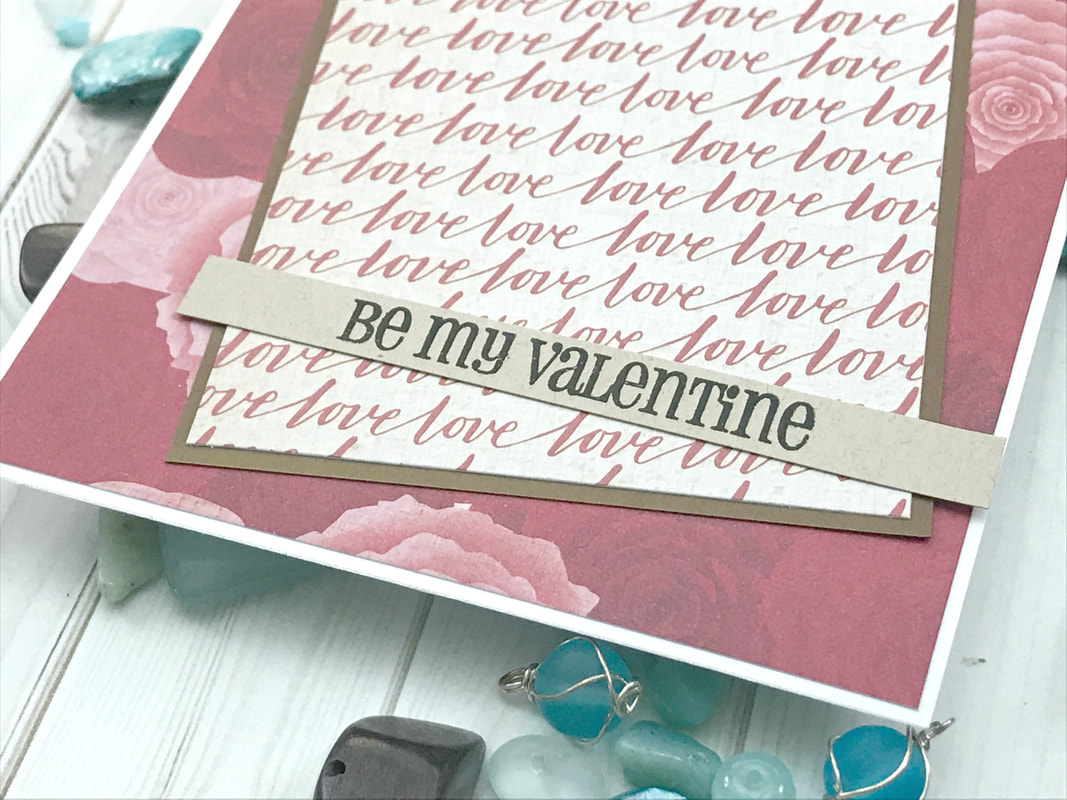  Click on the video below to see all the crafty details! When you are done watching the video, and want to see more, CLICK HERE to go to my YouTube Channel ... Don’t’ forget to LIKE and SUBSCRIBE to my channel! Always Remember... Be Inspired, Be Creative, ENJOY and SHARE what you create today! ~ Desiree 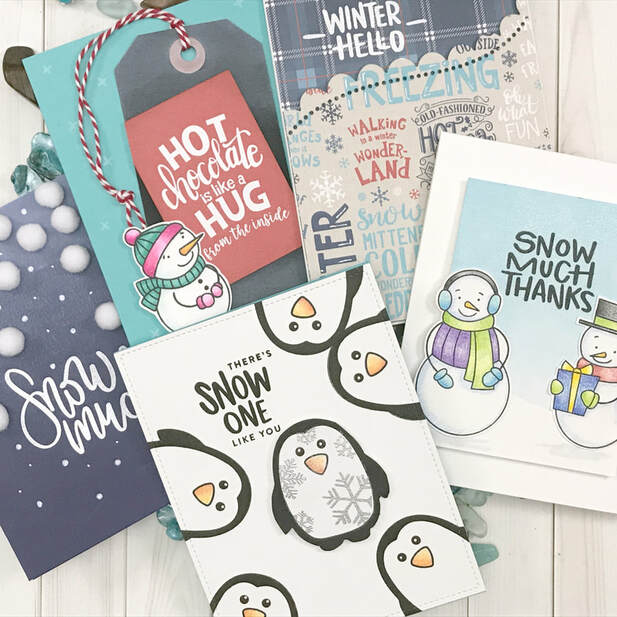 Hello Everyone! I am back with another 5 Card - 1 Kit video using the Simon Says Stamp Card Kit for January 2019! I absolutely loved this kit and had a great time making my cards! There are a few happy penquins and a few snowball fights along the way... Below are just a few of the cards that I made from this kit, but as always there is a video to see them all! 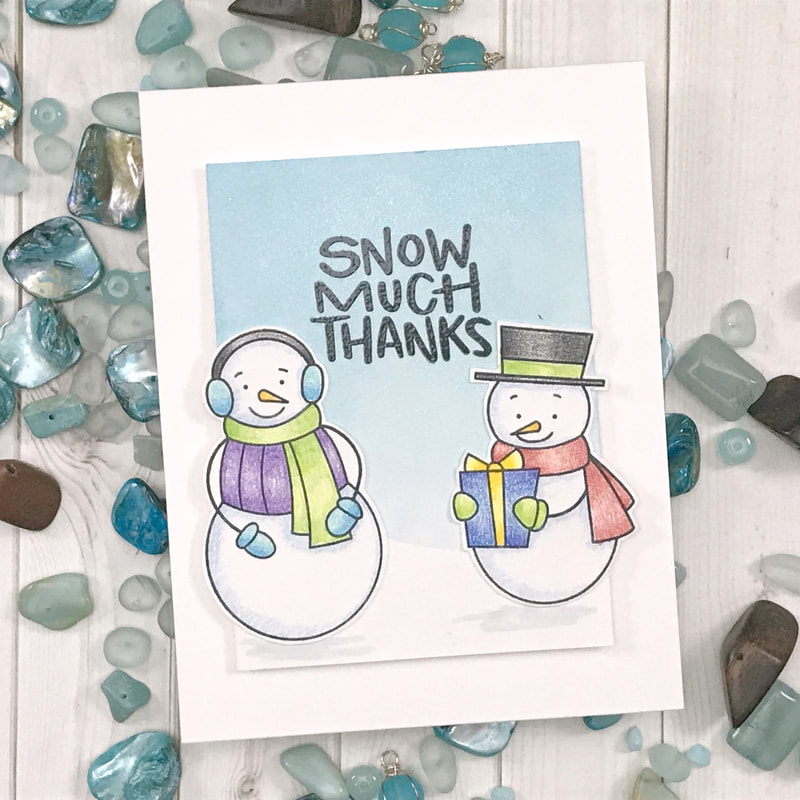 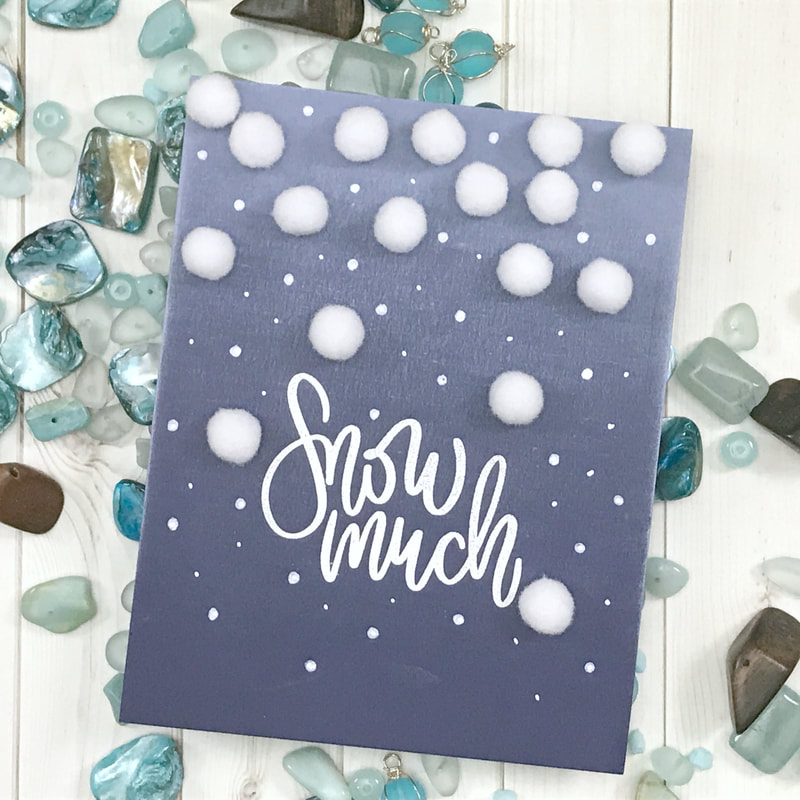 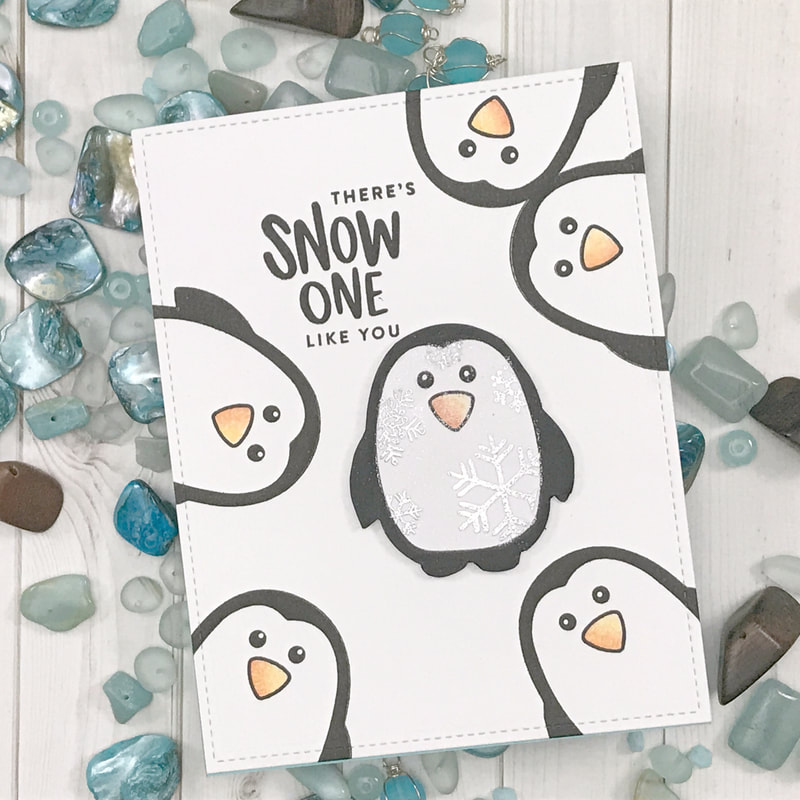 Just some of the products I used today in these projects... SSS Snow Much Stamp Set SSS Dot Scalloped Border Die SSS Fine Detail WHITE Embossing Powder White Gel Pens Darice White Pom-Poms Click the video below to see all the crafty details! When you are done watching the video, and want to see more, CLICK HERE to go to my YouTube Channel ...
Don’t’ forget to LIKE and SUBSCRIBE to my channel! Always Remember... Be Inspired, Be Creative, ENJOY and SHARE what you create today! ~ Desiree |

Getting Inky, suffering paper cuts, cutting using metal dies and stamping everything... These are just some of the fun and mischievous ways together we will create paper art! So stay and be motivated and inspired! ...and let me know what inspires your creativity!


Designer/Owner/Creator - Desiree
Well, hello there everyone! My name is Desiree Kuemmerle and I live in Lansdale, PA with the hubs of over 20 years and our furry bot Max! I am fluent in Crafting, a Master Paper Manipulator and a violator of all that makes sense...
Since about the time I spoke my first word, I’ve been an avid crafter alongside my mom and sister. You name the craft and I’ve probably bought it, collected it, tried it and finally stored it. Right now, getting Inky, suffering paper cuts, cutting with metal dies and stamping everything, whether it moves or not makes me smile and I must pass that along to everyone I know and don’t know! 
Inspiration Crafty Designs for...
 
DESIGN TEAM
Just a few Great places for all your CRAFTY needs!!!
 
Old Posts Never Die
November 2022
Search by Categories
All
|

 RSS Feed
SEARCH WEBSITEServiceslet's connect SOCIALLY! |
|
copyright!All content and designs included on my sites, social media and e-commerce webpages (i.e. Etsy, Facebook, ONLINE Courses and Website Store) are under COPYRIGHT © Desiree Kuemmerle, Include a Thank You, Desiree Tangles with Paper and Desiree Kuemmerle, CZT. Original artwork and designs are shared for your personal creations and inspiration only, unless otherwise stated by Desiree Kuemmerle.
© COPYRIGHT 2017-2024. by Desiree Tangles with Paper and (a.k.a.) Include a Thank You ...and then some! - Desiree Kuemmerle ALL RIGHTS RESERVED.
Include a Thank you
|