 Hello Everyone! Welcome back for Day 4 of my Halloween Series! Now we know Tim Holtz, Stampers Anonymous had to be part of this right? The stamp set I chose is called Pumpkin Heads... and I think they are great! Happy, Funny, Evil and even confused pumpkins are ready for any card! 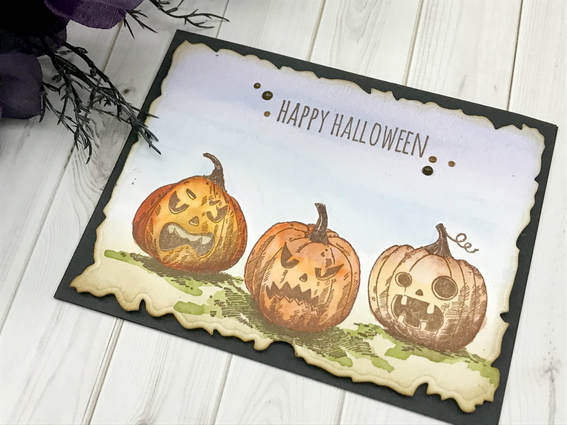 I used Archival Ink in Potting Soil to stamp and Hero Arts Liquid Watercolors to color my images (see List below). Paper I chose is Canson XL Water Color, which is usually my go to when water coloring. 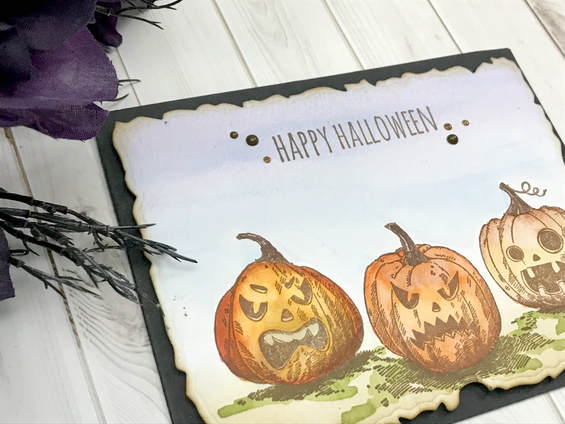 What is great with these images is they are already show you were your shading should go, so my darker colors were used there... I tries to make each pumpkin different in color to help make them stand out. Here is a list of the water colors I used for this project! Hero Arts Liquid Water Colors Strawberry Moss Art Print Brown Dandelion Mulled Wine Cocoa Purple Indigo Orange Black Velvet Silver Brush – Size 4 See each craft step by clicking on the video below! When you are done watching the video, and want to see more, CLICK HERE to go to my YouTube Channel so you can SUBSCRIBE and never miss another video!
Always Remember... Be Inspired, Be Creative, ENJOY and SHARE what you create today! ~ Desiree
0 Comments
 Hello Everyone! Welcome back for Day 3 of my Halloween Series for 2018! We are going to make a tag today... I love tags, and if you have been following me you have heard me say this many times... LOL... Tags are so flexible in our paper-crafting and in our home decor! So making a tag is like making a two-fer... For this project I am featuring a stamp set by Picket Fences Studios and the Stampers Anonymous #8 Chipboard Tags... 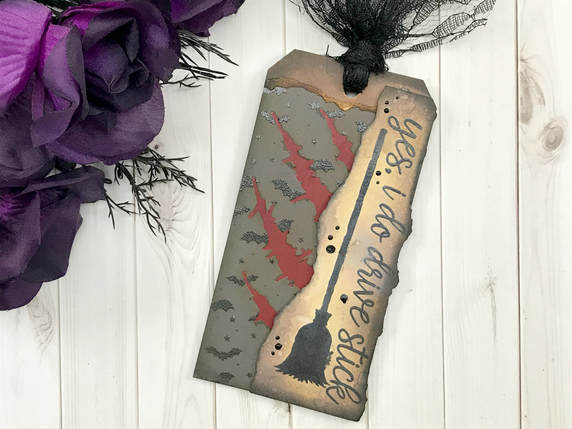 I started my layers with an acrylic pain in a deep red. The paints I used are from Dick Blick Studio and come in many colors... Once that was dry we added a pattern paper from the America Crafts Spooky Boo 6 x 6 Paper Pad, but I added die cut claws to it. This way the red paint showed through! 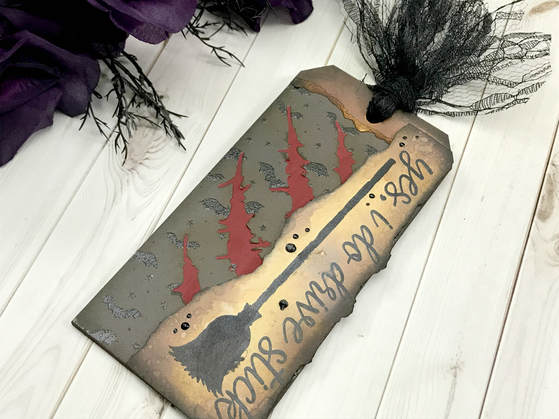 Then stamped my image onto a piece of Bristol Card Stock using my versafine ink and then heat embossed with clear powder.. Used mu Distress Oxides to add some texture and dimension... Here is a list of just some of the products I used for this project! Picket Fence Studios - Yes, I do drive stick! Stamp Set Distress Oxides – Back Soot Distress Oxides – Ground Espresso Distress Oxides – Gathered Twigs Distress Oxides - Antique Linen Check out all the crafty steps below by clicking on the video! When you are done watching the video, and want to see more, CLICK HERE to go to my YouTube Channel so you can SUBSCRIBE and never miss another video!
Always Remember... Be Inspired, Be Creative, ENJOY and SHARE what you create today! ~ Desiree  Hello Everyone! Welcome back for Day 2 of my Halloween Series for 2018! Today, we are going to combine two simple techniques... oxide blending and die cutting. Using Bristol card stock I created two blended panels. One was for my night sky and the other created the background to the Haunted House! 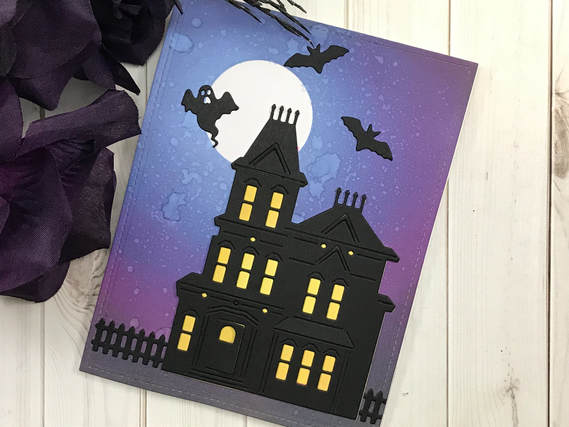 But where to place the sentiment? On the inside of course! Always remember, paper has two side and when we have a card base the side are almost endless! LOL So use up those extra die cut pieces! 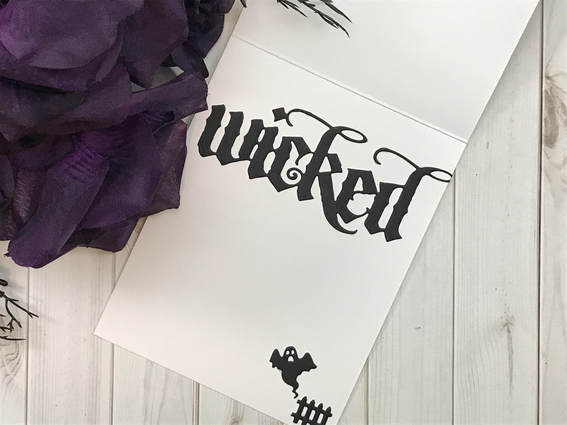 Here is a list of just some of the products I used for this project! Hero Arts - Paper Layering Haunted House Die Sizzix - Tim Holtz Alterations - Wicked Die Set Distress Oxides – Back Soot Distress Oxides – Seedless Preserves Distress Oxides – Faded Jeans Distress Oxides - Tumbled Glass See all the eerie details by clicking on the video below! When you are done watching the video, and want to see more, CLICK HERE to go to my YouTube Channel so you can SUBSCRIBE and never miss another video!
Always Remember... Be Inspired, Be Creative, ENJOY and SHARE what you create today! ~ Desiree  Hello Everyone! Bumps in the night... Nights filled with fright... A scream in the hall... A cold chill for it all... What could all this mean... Of course it is the start of my Halloween Series for 2018! LOL!!! Day 1 - I am featuring a die set from the Spellbinders Large Die of the Month Club for September. This die is wonderful, it makes a spooky lantern for the Halloween Season! 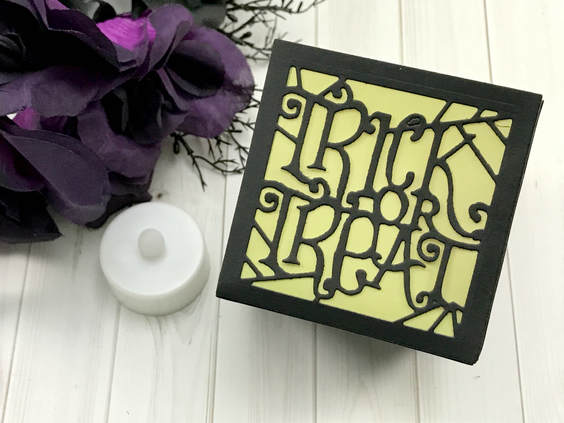 With some black card stock , vellum and of course my distress oxides this project is created in no time! Here is a list of just some of the products I used for this project! Distress Oxides – Wilted Violet Distress Oxides – Twisted Citron Distress Oxides – Carved Pumpkin Vellum Card Stock Click the video below to see all the creative spooky steps.... But make sure you stick around for so much more.... When you are done watching the video, and want to see more, CLICK HERE to go to my YouTube Channel so you can SUBSCRIBE and never miss another video!
Always Remember... Be Inspired, Be Creative, ENJOY and SHARE what you create today! ~ Desiree |

Getting Inky, suffering paper cuts, cutting using metal dies and stamping everything... These are just some of the fun and mischievous ways together we will create paper art! So stay and be motivated and inspired! ...and let me know what inspires your creativity!


Designer/Owner/Creator - Desiree
Well, hello there everyone! My name is Desiree Kuemmerle and I live in Lansdale, PA with the hubs of over 20 years and our furry bot Max! I am fluent in Crafting, a Master Paper Manipulator and a violator of all that makes sense...
Since about the time I spoke my first word, I’ve been an avid crafter alongside my mom and sister. You name the craft and I’ve probably bought it, collected it, tried it and finally stored it. Right now, getting Inky, suffering paper cuts, cutting with metal dies and stamping everything, whether it moves or not makes me smile and I must pass that along to everyone I know and don’t know! 
Inspiration Crafty Designs for...
 
DESIGN TEAM
Just a few Great places for all your CRAFTY needs!!!
 
Old Posts Never Die
November 2022
Search by Categories
All
|
 RSS Feed
SEARCH WEBSITEServiceslet's connect SOCIALLY! |
|
copyright!All content and designs included on my sites, social media and e-commerce webpages (i.e. Etsy, Facebook, ONLINE Courses and Website Store) are under COPYRIGHT © Desiree Kuemmerle, Include a Thank You, Desiree Tangles with Paper and Desiree Kuemmerle, CZT. Original artwork and designs are shared for your personal creations and inspiration only, unless otherwise stated by Desiree Kuemmerle.
© COPYRIGHT 2017-2024. by Desiree Tangles with Paper and (a.k.a.) Include a Thank You ...and then some! - Desiree Kuemmerle ALL RIGHTS RESERVED.
Include a Thank you
|