Include a Thank You ...and then some!
  • Blog
  • Tutorials
    • The Technique Series
  • FREE DOWNLOADS
  • STOREFRONT

Scrapping for Less | Flavor of the Month Card Kit | December 2018

12/29/2018

8 Comments

 
Picture
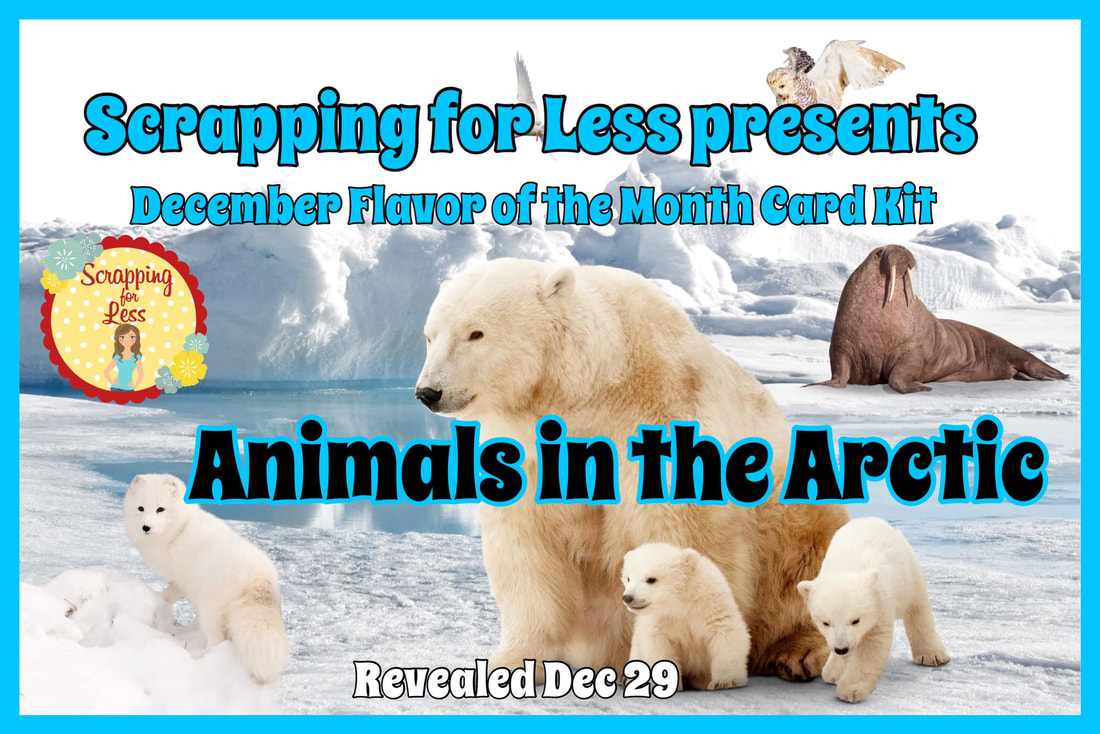
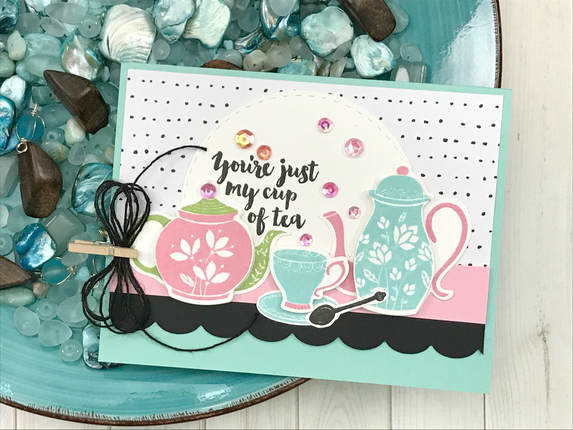
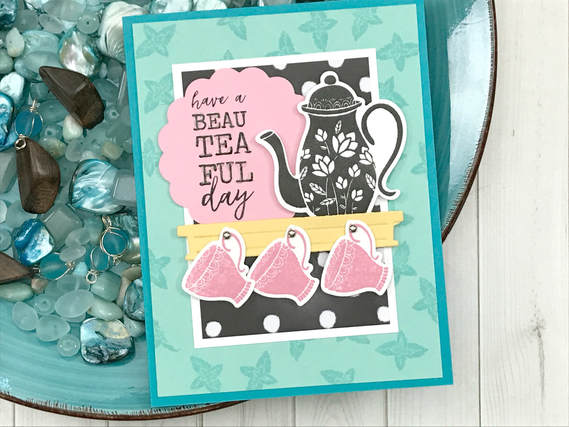
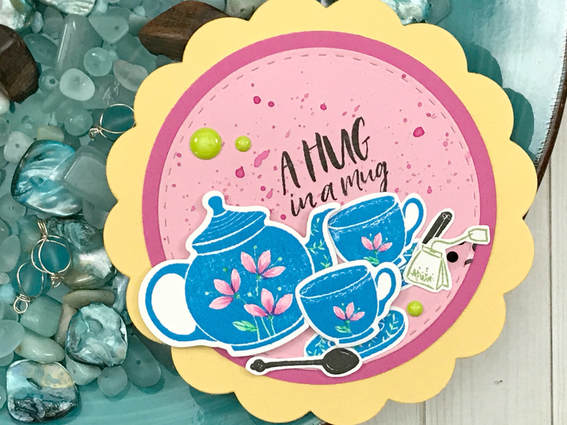
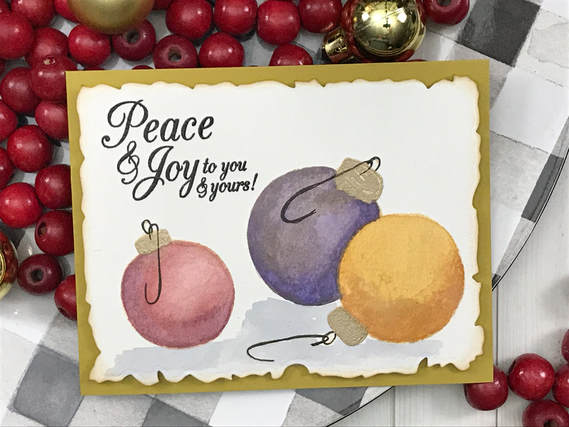
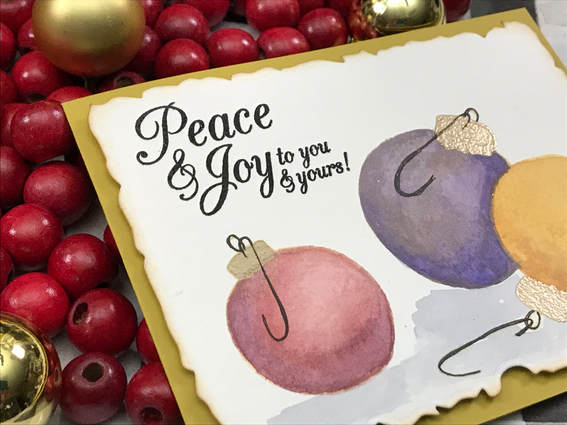
Hello Everyone!
December’s kit is all about Arctic Animals…

Now if you are anything like me, you hate the cold weather, snow, and anything that would mean being cold. However, snow and these cute little critters in this kit are all about fun!

​So grab your warm beverage
, sit back, and hop along with us to see these adorable critters and all the inspiration our designers have to share.  
​Check out the Flavor of the Month page to place your order if you haven’t subscribed. Also, don’t forget to check the A La Carte items (items that are leftover (full packs and such) from putting the kits together, and other items that we have on the website that may coordinate with this kit.

Make sure you click on the links below to get your kit and stay connected!
FLAVOR OF THE MONTH CARD KIT
DOWNLOADS
BLOG
SHOP
Now for some inspiration!  Here are three cards I made from the kit!  Stop by my YouTube Channel to see more!
Picture
Picture
Picture
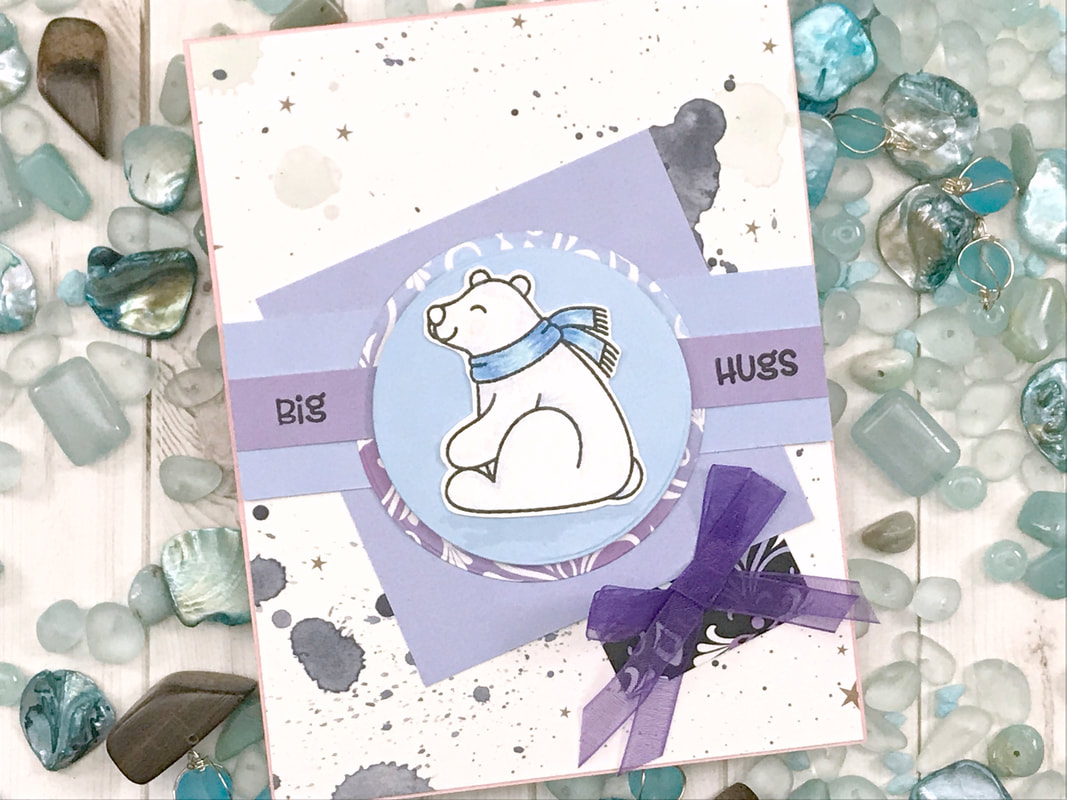
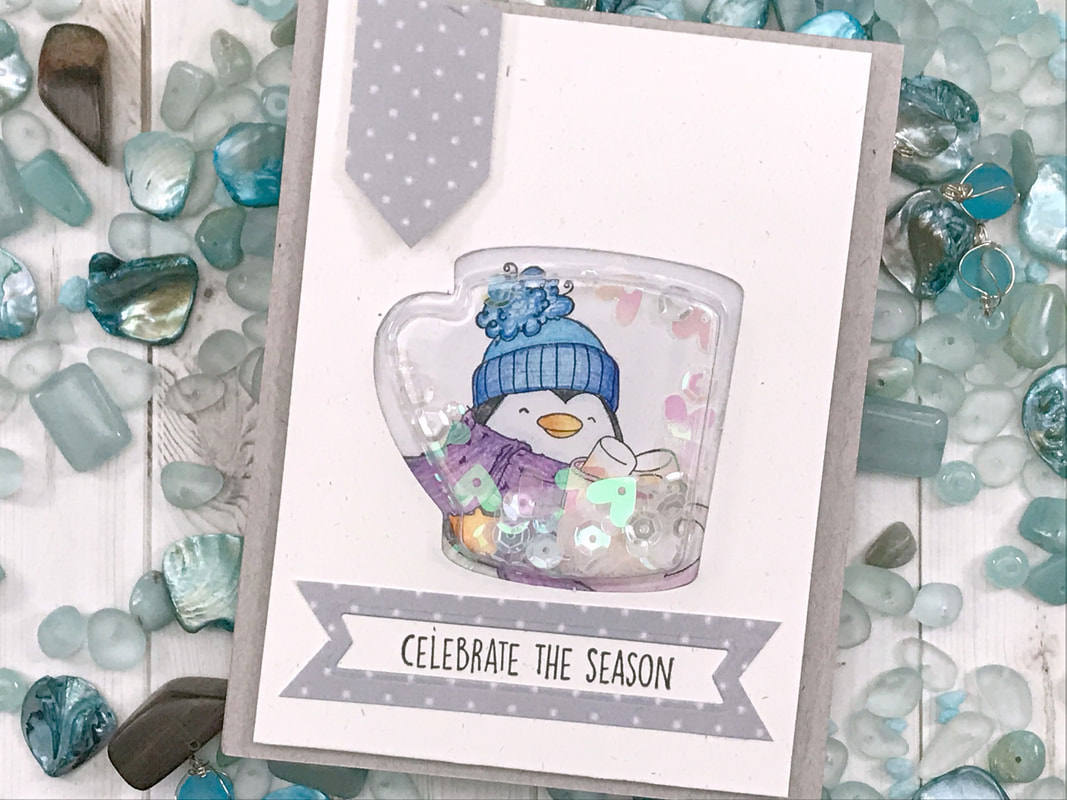
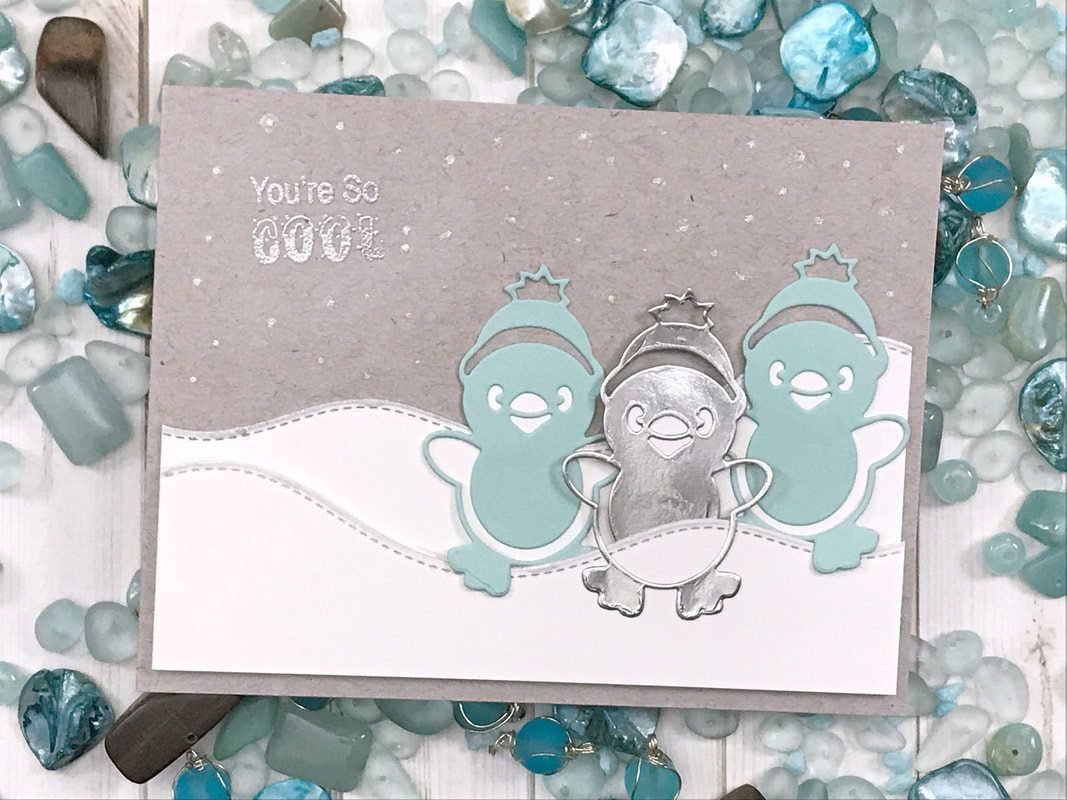
​Let's see what you will get in your Scrapping for Less Flavor of the Month Card Kit for December 2018!
Picture
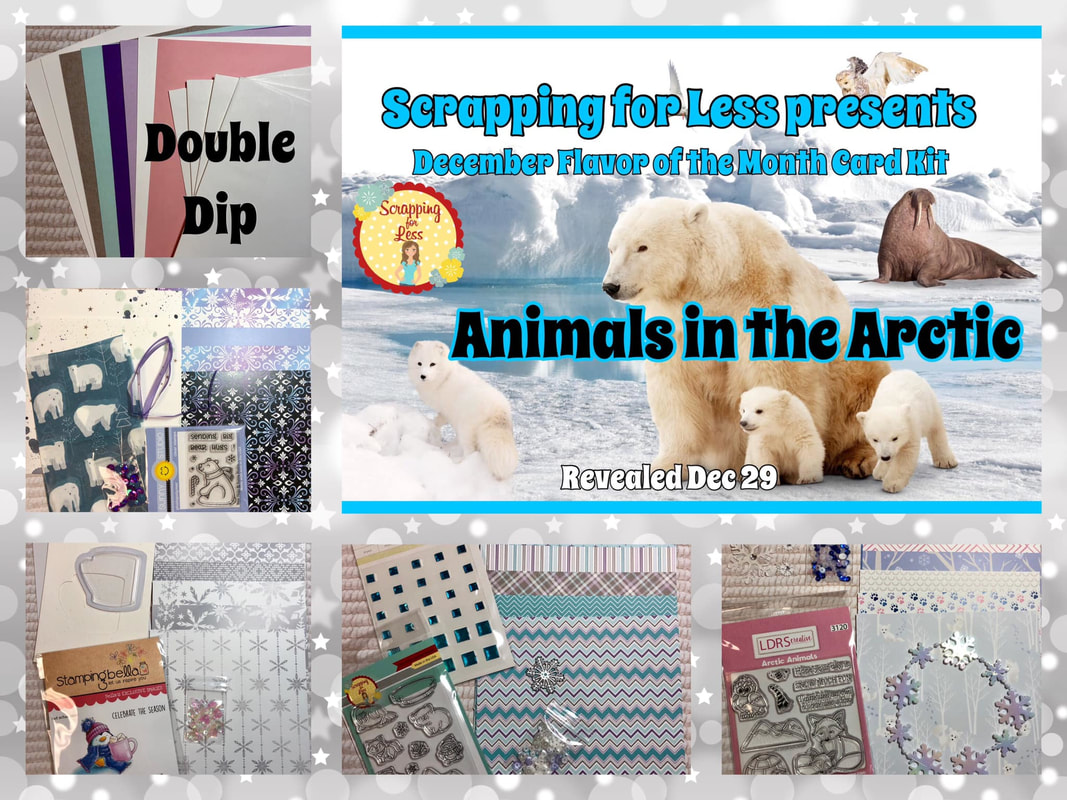
Double Dip Subscription
Picture
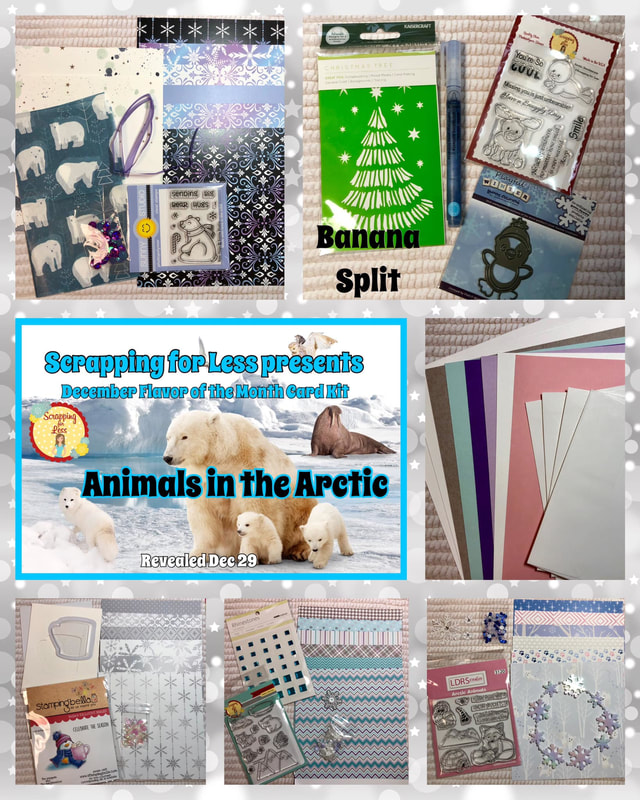
Banana Split Subscription
OK now let's get ready to hop along and see some wonderful inspiration!

SFL Blog
Lynnea
Christine
Crystal
Luci
Katie
LeeAnn
Courtney
Jenn

It's ME <---> YOU ARE HERE!
GUEST DESIGNER: Ashley Tucker
GUEST DESIGNER: Sara Oliver

Stacy
​Make sure you also put your name in for that Rafflecopter prize!
​Thanks again for hopping with us, and Happy Crafting!

But Always Remember...
Be Inspired, Be Creative, ENJOY and SHARE what you create today!
~ Desiree
8 Comments

Believe and Tall Triangle Die Set | Birch Press Design Team Project

12/26/2018

0 Comments

 
Picture
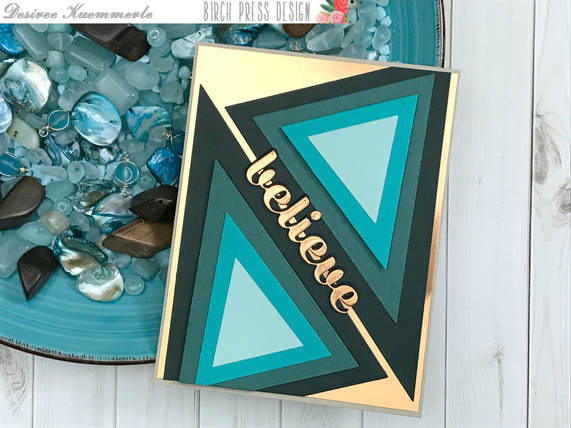
Hello Everyone!

Today I am going to be creative with the Tall Triangle Set and the Believe Sugar Script Sentiment Die!  

Hard to images a die so simple in shape can have so many possibilities!
GIVEAWAY ALERT - make sure you read to the end of this post to get all the details!!!!
For this card I wanted a deco or modern feel.  So I went with a strong copper metallic card stock and shades of green and teal for my triangle die cuts.  I layered most directly on top of each other using liquid adhesive but chose one layer on each triangle set to be popped up using my foam squares.
Picture
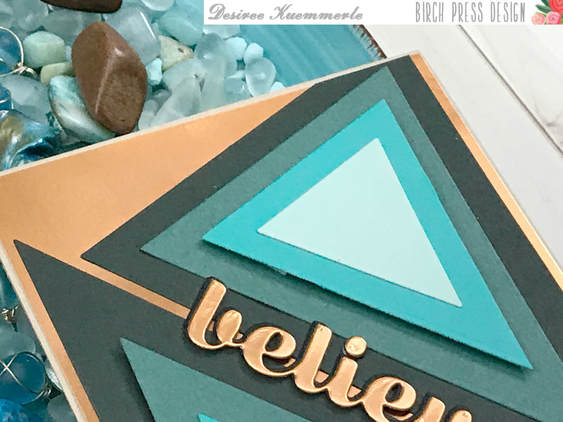
​These were placed on my copper panel on an angel and trimmed of the edges even with my design base on the top and bottom.
Picture
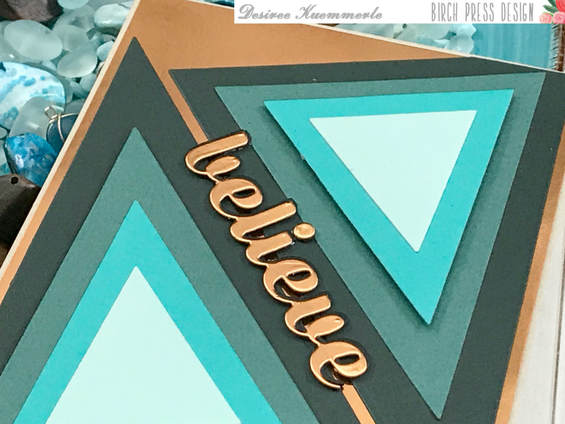
For my sentiment I used the Believe Sugar Script die.  I cut multiple sentiments from black card stock and one from copper mirror to match the background.
​
Once these were set, I placed my sentiment between my two triangles.
I used my liquid adhesive to secure my panel to my standard A2 size top folding card base (4 1/4 inch x 5 1/2 inch).

GIVEAWAY @birchpressdesign

​Up on the @birchpressdesign blog today featuring the Tall Triangle and Believe Sugar Script Die Sets! See all the craft details on my channel!  PRIZE ALERT!  Make sure you check out the @birchpressdesign Instagram for all the details to enter!  

GIVEAWAY closes January 2nd, 2019 at midnight US EST!!!

Need to know more, just click on the video below and see all the crafty details!
When you are done watching the video, and want to see more, CLICK HERE to go to my YouTube Channel ...  

Don’t’ forget to LIKE and SUBSCRIBE to my channel!

Always Remember...

Be Inspired, Be Creative, ENJOY and SHARE what you create today!
~ Desiree
0 Comments

Spellbinders New Collections Inspiration BLOG HOP! featuring Exquisite Splendor by Marisa Job

12/19/2018

52 Comments

 
Picture
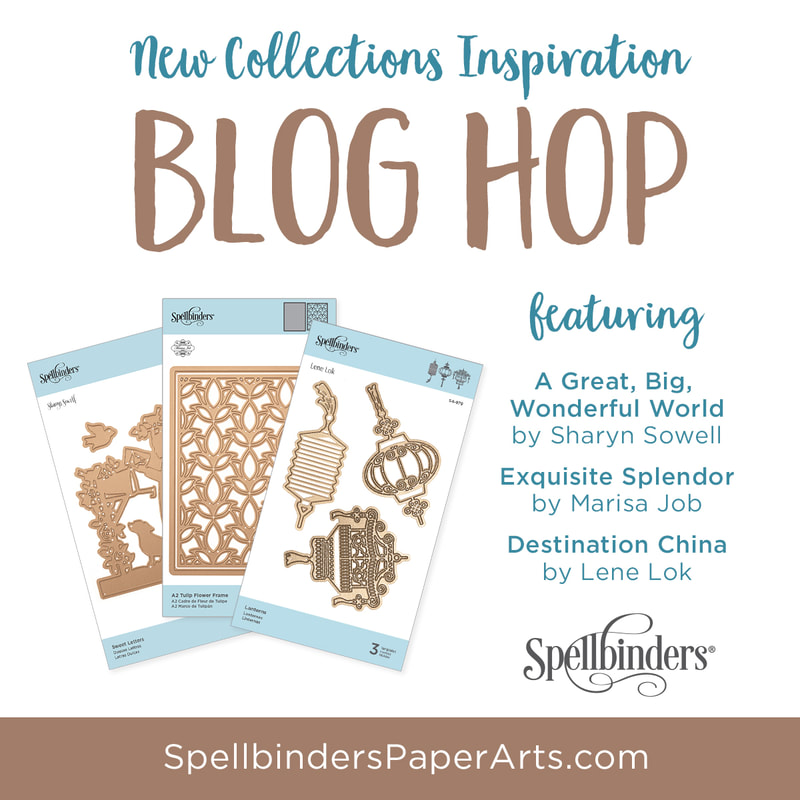
Hello Everyone!

Today let's celebrate a new release by Spellbinders!   ...and let's HOP as well! There are several product lines to chose from in this release.  I will be featuring Exquisite Splendor by Marisa Job, but I encourage you to check out the other arrivals also...  They are Great, Big, Wonderful World by Sharyn Sowell and Destinations China by Lene Lok!

As always these dies are well crafted and take our paper crafting skills to the next level!
Picture
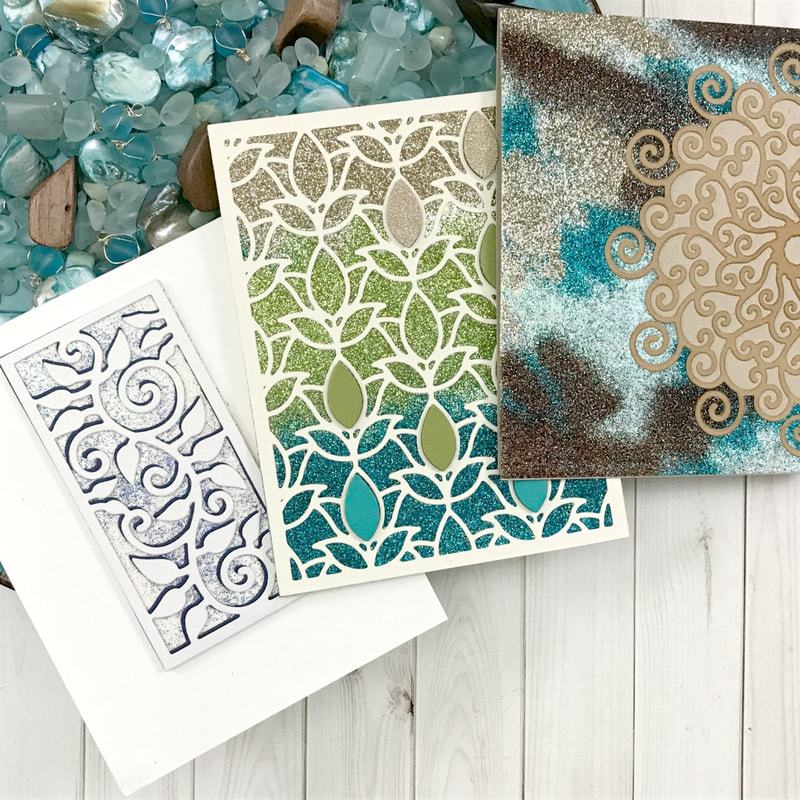
While making our cards today I wanted to create the back panes using glitter!  We all have tons of this and it seems to keep growing on its own...  So let's dig in and get glittery (I know not a word, but it sounds cute, right?)
Picture
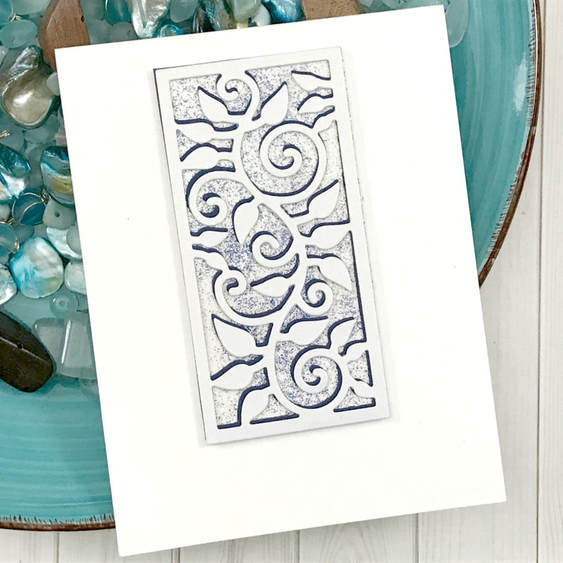
For my First project I used the Leaf Border die... I layers two colors of glitter when I created my panel and then cut out the same colors in my card stock and created a shadow.  This helped to allow my focal point to stand out and give the image of a shadow panel...
Picture
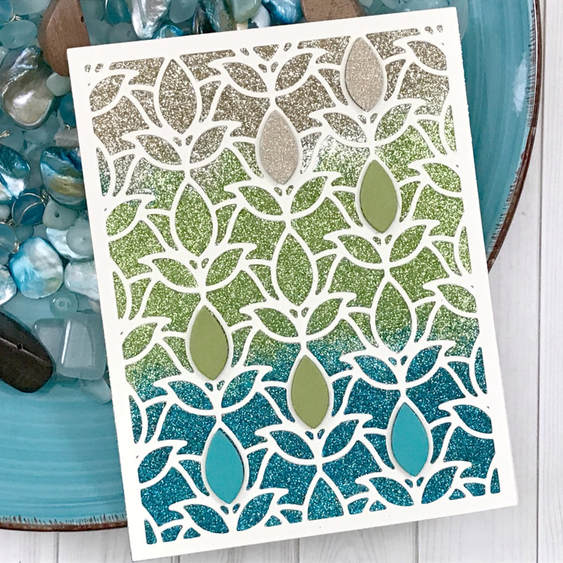
Next up is the A2 Tulip Flower Frame die...  This die will fit perfectly on the front of your Standard A2 size card base (4 1/4 inc x 5 1/2 in).  There are so many possibilities and techniques you can use for this die.  I chose my glitter background and also used card stock close tot he colors and added them on top to add dimension!
Picture
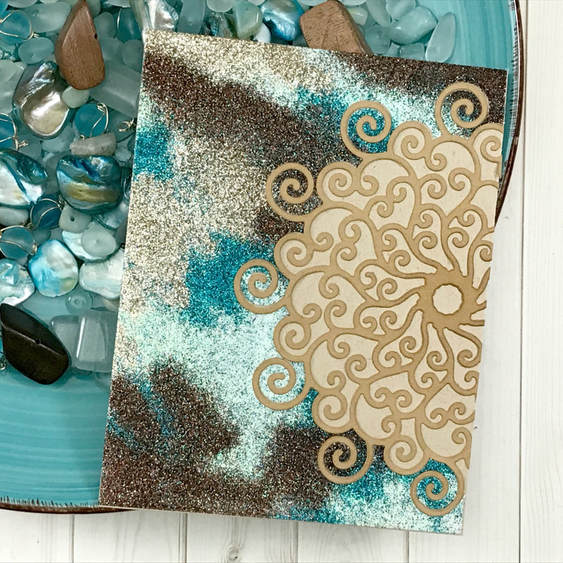
For my final card I used the Swirly Doily die and I was very much inspired by the picture on the back of the packaging!  I used the die to cut both my focal point and a section out of my panel... 

Once you get your dies you will be creating many projects to come....

​
​Spellbinders - GIVEAWAY!

To celebrate this release, we are giving away a $50 gift certificate to one blog reader – selected from the comments across all of the blogs in the hop. Giveaway closes on Sunday, December 23rd at 11:59 pm EDT. The winner will be announced in the blog hop post the following Monday. Winner is responsible for shipping cost, duties and taxes.

​
​Make sure you keep hopping for even more inspiration!

Spellbinders
Marisa Job
YOU ARE HERE!!!! --> It's ME... <--
Hussena Calcuttawala
Jennifer Snyder
Erum Tasneem
Anita Kejriwal
Sharyn Sowell
Mayline Jung
Anna Komenda
Brenda Noelke
Deepti Malik
Tina Smith
Mona Tóth
Ilda Dias
Laura Volpes
Kaja Vezenšek
Caly Person
Jean Manis

Click the video below to see all the crafty details and some tips and tricks along the way!
When you are done watching the video, and want to see more, CLICK HERE to go to my YouTube Channel ... 
 
​Don’t’ forget to LIKE and SUBSCRIBE to my channel!
 
Always Remember...
 
Be Inspired, Be Creative, ENJOY and SHARE what you create today!
~ Desiree
52 Comments

Bloom Box Creative Kit | Fun Stampers Journey!

12/17/2018

0 Comments

 
Picture
Hello Everyone!  

​I am here today showcasing the Fun Stampers Journey Bloom Kit!  
The Bloom Box is a pre-packaged and pre-cut kit that includes everything, (OK, you will need adhesive and ink),you will need to make several cards in no time!
Card Stock is already cut and sized for you...  just stamp away and you will have beautiful card in no time!
Picture
Some many techniques are given with detailed instructions for each project in the kit.  Many tips and tricks are learned along the way.
Picture
Creative ways of stamping or adding your embellishments!
Picture
Not the normal shapes for your card making journey!
If you need to now more about Fun Stampers Journey, the links are below! Make sure you checkout their Blog, Catalog and Event Page to stay in the know...
Fun Stampers Journey

​SHOP
KITS
 
BLOOM BOX - November 2018: Cup of Tea
 
BLOG
EVENTS
CATALOG
Click on the video below to see all the crafty details of this wonderful kit!
When you are done watching the video, and want to see more, CLICK HERE to go to my YouTube Channel ...  

Don’t’ forget to LIKE and SUBSCRIBE to my channel!

Always Remember...

Be Inspired, Be Creative, ENJOY and SHARE what you create today!
~ Desiree
0 Comments

Day 12 | Christmas Series 2018

12/16/2018

0 Comments

 
Picture
Hello Everyone!
Welcome back for Day 12 of my 2018 Christmas Series...  Today I am featuring Penny Black Stamps and Hero Arts!
Penny Black has always been a favorite stamp company of mine.  There images are beautiful and perfect for any coloring medium...  What their stamps also do is take the intimidation out of the picture...  continue and you will see what I mean!
Picture
The stamp set I used today is called Adornments...  I knew I wanted to water color them so I grabbed my QoR Water Colors...
Picture
I bet looking at these you are thinking great watercolor technique...  But I can tell you I am not a water colorist, this is all the stamps doing!  
Here are just some of the products used to make this card...

Penny Black - Adornments
​
Penny Black - Antique Frame Dies
Hero Arts - Christmas Sentiments
QoR Water Colors
Click on the video below to see all the crafty details...  With these stamps we can all water color!
When you are done watching the video, and want to see more, CLICK HERE to go to my YouTube Channel ... 
 
​Don’t’ forget to LIKE and SUBSCRIBE to my channel!
 
Always Remember...
 
Be Inspired, Be Creative, ENJOY and SHARE what you create today!
~ Desiree
0 Comments

Nativity Star and Simple Peace | Birch Press Design

12/12/2018

1 Comment

 
Picture
Hello Everyone!

Today I am here with another design team project for Birch Press Design featuring two of their beautiful layering die sets!  

Nativity Star
Simple Peace
​
This die is one that is great for not only making a card, but also adding ornaments to your tree or even a gift to someone special!
Picture
I first die cut all my pieces and ready for assembly.  I die cut each layer from the Nativity Star Die Set and also from the Simple Peace Die Set.

The color I chose were very natural looking and had a warm feel to them, with a little gold sparkly to add a little sparkle.  

When layering each piece I used my liquid adhesive to ensure a secure bond and set aside to set and dry.
​
I then placed my pieces onto my design base, cut at 4 1/8 inches x 5 3/8 inches, this way I knew where I wanted to place a touch of ink to sit just behind my star.
Picture
For my sentiment I used Simple Peace.  This is a two-layer die set and for the second I chose a gold glitter card stock to add a touch of sparkle.
​
Once all my dies were glued together it is time to put our card together.  I started by placing my star in place and used an acrylic block to make sure it dried flat onto your card base. Next my sentiment was set towards the bottom of my card.
Make sure you click on the video below to see all the crafty details!
When you are done watching the video, and want to see more, CLICK HERE to go to my YouTube Channel ...  

Don’t’ forget to LIKE and SUBSCRIBE to my channel!

Always Remember...

Be Inspired, Be Creative, ENJOY and SHARE what you create today!
~ Desiree
1 Comment

You are Loved | Simon Says Stamp DieCember®

12/11/2018

0 Comments

 
Picture
Hello Everyone!

Simon Says Stamp is having another release during their month long DieCember® celebration.  

This one is called "You are Loved" - and we all are in some way,right?!?

​Today I am using their Outline Clustered Leaved die, and this is a great size!  It measure approximately 6 1/2 inches x 4 inches.  Possibility are endless when using this image.
Picture
I chose very soft and light colors for my card.  I grabbed my 'You matter' background stamp and a light ink.  I cut my image using white card stock to create a different type of silhouette.
Picture
Used a sentiment from a prior Simon Says Stamp Kit and turned it into a tag with just a hint of a bold color to help it to stand out!
Here are just some of the products I used for this card...

​SSS – Outline Clustered Leaves 
SSS – You Matter Background Stamp 
SSS – Brush Stroke Messages Stamp Set 
SSS – Stitched Rectangle Dies 
SSS – Fog Ink Pad 

Click on the video below to see all the fun crafty details!
When you are done watching the video, and want to see more, CLICK HERE to go to my YouTube Channel ... 
 
​Don’t’ forget to LIKE and SUBSCRIBE to my channel!
 
Always Remember...
 
Be Inspired, Be Creative, ENJOY and SHARE what you create today!
~ Desiree
0 Comments

Day 10 | Christmas Series 2018

12/8/2018

1 Comment

 
Picture
Hello Everyone!

Welcome Back for Day 10 of my Christmas Series!  Today it is all about the tags and getting inky!
When I combine tags and ink smooshing with distress oxides, I am in my creative heaven!  I could make these ALL DAY LONG!
So let's get started and remember HAVE FUN!
Picture
These were made using Hero Arts Fancy Dies in a tree and ornament shape...  I always cut two so my tags can have layers to them...

i then went to town ink smooshing EVERYTHING! (see the video for all the details...)
Picture
My sentiments were from a Hero Arts sentiment pack and it was perfect with some wonderful sarcasm!  Now please, do not panic, I LOVE CHRISTMAS!
Picture
Finished all make tags off with long tassel that just give that extra touch!
Here are some of the products used to make this project...

​Hero Arts Ornament Tag – 
Hero Arts Tree Tag – 
Hero Arts – Off Beat Holiday Messages – 

Distress Oxides
Barn Door
Abandoned Coral
Dried Marigold
Aged Mahogany
Festive Berries
Worn Lipstick
Forest Moss
Bundled Sage
Old Pape
Pine Needles
Evergreen Bough
Cracked Pistachio
Click the video below to get all the inky and crafty details!
When you are done watching the video, and want to see more, CLICK HERE to go to my YouTube Channel ... 
 
​Don’t’ forget to LIKE and SUBSCRIBE to my channel!
 
Always Remember...
 
Be Inspired, Be Creative, ENJOY and SHARE what you create today!
~ Desiree
1 Comment

Day 9 | Christmas Series 2018

12/6/2018

0 Comments

 
Picture
Hello Everyone!

Welcome for Day 9 of my 2018 Christmas Series Once again!  I must admit I am absolutely enjoying each creation I made for this series!  I hope you are getting a lot of inspiration for your holiday creations this year!
For Day 9, I am focusing on Simon Says Stamp and Penny Black!  I pulled out a back ground stamp called Snowflake Outline.  This background is perfect for any medium you have in your stash or is your favorite to create with!
Picture
So I am going to use the same stamp and die sets for two cards, but you will see two completely different looks!
Picture
For card 1, used white embossing powder and a white pencil by Faber Castel...  Simple, right? No need to color a solid image, but you definitely could! I chose a colorless blender pencil by Prismacolor to blend out the edges of my color line...  Used a jagged edge die to make it is look like a frosted window added a sentiment, both from Penn Black and a hint of white pigment ink and there ya go!
Picture
For Card 2, let use some gold embossing powder, add some ink to the bottom of the design.  You can chose which way you want to add your color, I chose to use a blender brush and a plain sponge (nothing fancy)...  added some white pigment ink to the top to smooth out my ink edge and also make the top lighter!  Used the same frame die and sentiment set as my previous card....  Added a little bling to this card using some metallic paper and metallic drops for accents!
Here are just a few of the supplies I used making these cards...

SSS Snowflake Outline Background Stamp
Penny Black Antique Frame Dies
Penny Black Christmas Sentiments
Tim Holtz 8 x 8 Paper Pad - Metallic Gold/Silver 
Click on the video below so you do miss any of the craft detail so you can make some for yourself!
When you are done watching the video, and want to see more, CLICK HERE to go to my YouTube Channel ... 
 
​Don’t’ forget to LIKE and SUBSCRIBE to my channel!
 
Always Remember...
 
Be Inspired, Be Creative, ENJOY and SHARE what you create today!
~ Desiree
0 Comments

Day 8 | Christmas Series 2018

12/4/2018

0 Comments

 
Picture
Hello Everyone!

Welcome back for Day 8 of my 2018 Christmas Series!  Today I am featuring My Favorite Things and Simon Says Stamp together!  Now I have made a lot of tags, so lets get back to cards!
For day 8 I am going to show you how you can make your own pattern paper and create 2 cards from 1 panel!
Now dig into your stash and find that perfect die!  This is one to have both a good negative and positive cut out!  Not sure what I mean, just look below and see!
Picture
For these two cards I started out by making my background pattern using shades of blue ink.  Once completed I added shading with my blender brushes...
Picture
I then placed my frame and focal die in place and cut out my design.  YES save all your pieces!  For the card with the negative cut out We made a shaker card!
Picture
For the second card I used the cut outs and placed my sentiment on the front and continued it in the inside of the card!
Here are just a few products used to make these cards...

MFT - Wonky Stitched Rectangle Dies
MFT - Ho Ho Ho Die
SSS - Lots of Snowflakes
Click the video below for all the craft details...  of course some added tips and tricks along the way!
When you are done watching the video, and want to see more, CLICK HERE to go to my YouTube Channel ... 
 
​Don’t’ forget to LIKE and SUBSCRIBE to my channel!
 
Always Remember...
 
Be Inspired, Be Creative, ENJOY and SHARE what you create today!
~ Desiree
0 Comments
<<Previous
    Picture
    Getting Inky, suffering paper cuts, cutting using metal dies and stamping everything...  These are just some of the fun and mischievous ways together we will create paper art!  So stay and be motivated and inspired! ...and let me know what inspires your creativity!
    Picture
    Picture
    Designer/Owner/Creator - Desiree
    Since about the time I spoke my first word, I’ve been an avid crafter alongside my mom and sister. You name the craft and I’ve probably made it and collected it. I simply find so much joy in working with my hands and seeing a happy customer with one of my creations. There’s nothing better! But I also love helping people become stronger and seeing them find THEIR happy through THEIR creations.​
    Picture
    Follow
    You can CLICK on the button above and connect through the website!
    -OR-
    ​You can fill in your email address below and receive a notification when a new post is added to my Blog!
    Follow
    Picture
    Crafty Designs for...
    Picture
    Picture
    Just a few Great places for all your CRAFTY needs!!!
    Shop Your Fav Brands at Scrapbook.com
    Picture
    Picture
    www.dickblick.com
    Picture

    Old Posts Never Die

    December 2020
    November 2020
    October 2020
    September 2020
    August 2020
    July 2020
    June 2020
    May 2020
    April 2020
    March 2020
    February 2020
    January 2020
    December 2019
    November 2019
    October 2019
    September 2019
    August 2019
    July 2019
    June 2019
    May 2019
    April 2019
    March 2019
    February 2019
    January 2019
    December 2018
    November 2018
    October 2018
    September 2018
    August 2018
    July 2018
    June 2018
    May 2018
    April 2018
    March 2018
    February 2018
    January 2018
    December 2017
    November 2017
    October 2017
    September 2017
    August 2017
    July 2017
    June 2017

    Search by Categories

    All
    '31' Tags Of Halloween 2017
    Altenew
    Avery Elle
    Birch Press Design
    Brutus Monroe
    Christmas Series 2018
    Christmas Series 2019
    Christmas Series 2020
    Create And INKspire
    Elizabeth Craft Designs
    FSJ: Fun Stampers Journey
    Gift Giving Ideas
    Gina K Designs
    Halloween Cards
    Halloween Series 2018
    Heffy Doodle
    Hero Arts
    Jillibean Soup
    Joy Clair Stamps
    Junk Journals
    La La Land Crafts
    Lawn Fawn
    Masculine Cards
    Memory Box
    MFT: My Favorite Things
    Mix Media
    My Creative Time
    My Hero Arts Monthly Card Kit
    National Scrapbook Day 2018
    Newton's Nook
    NSD 2018
    Peg Stamps
    Penny Black
    Pink N Main
    Planner Accessories
    Product Reviews And Demos
    Rubber Stamp Tapestry
    Scrapbook Album
    Scrapping For Less
    SFL Design Team
    Simon Says Stamp
    Simplicity Series
    Spellbinders
    Stampers Anonymous
    Stampin' Up!
    Sunny Studio Stamps
    Swatching You Colors
    Sweet Manhattan Stamps
    Tonic Studios
    Trinity Stamps
    Unknown Stamp Companies

    RSS Feed

Services

Handmade Stuff - When YOU do not have the time!
​Tutorials
F.A.Q.-COMING SOON!
Contact
​
Shipping / Return Policies
​Private Policy

SEARCH WEBSITE

Include a Thank you

P.O. Box 1383
​North Wales, PA  19454

let's connect

copyright!

All content and designs included on my sites, social media and e-commerce webpages (i.e. Etsy, Facebook, Website Store) are COPYRIGHT © Desiree Kuemmerle and Include a Thank You …and then some! Original artwork and designs are shared for your personal creations and inspiration only, unless otherwise stated in blog post or photo..
​© COPYRIGHT 2017-2020. ​by Include a Thank You ...and then some! - Desiree Kuemmerle ALL RIGHTS RESERVED.
  • Blog
  • Tutorials
    • The Technique Series
  • FREE DOWNLOADS
  • STOREFRONT