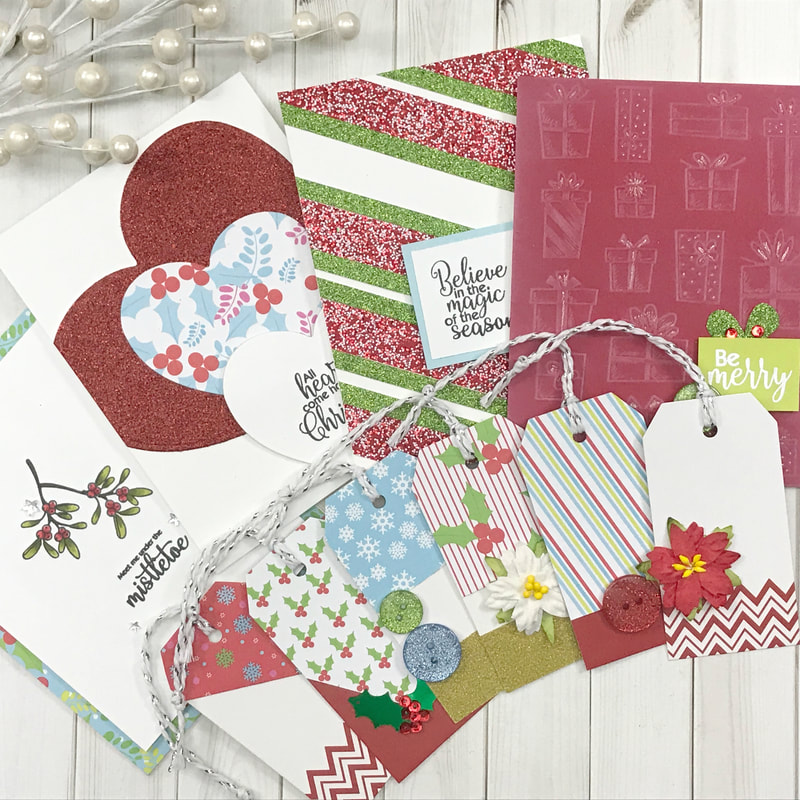
 Hello Everyone! I am here today with Pink and Main and their Christmas Box for 2019 called be Merry! This kit is jammed packed with sparkle and all the Holiday Cheer you need to create your tags or cards for this holiday season! For this kit I created 6 tags and 4 cards just to get started, but so many more possibilities are let to try. The stamp set is perfect to pull out your favorite coloring medium to create all the scene you would need... So let's not wait any longer, below are a few photos of the projects I made for today's video... 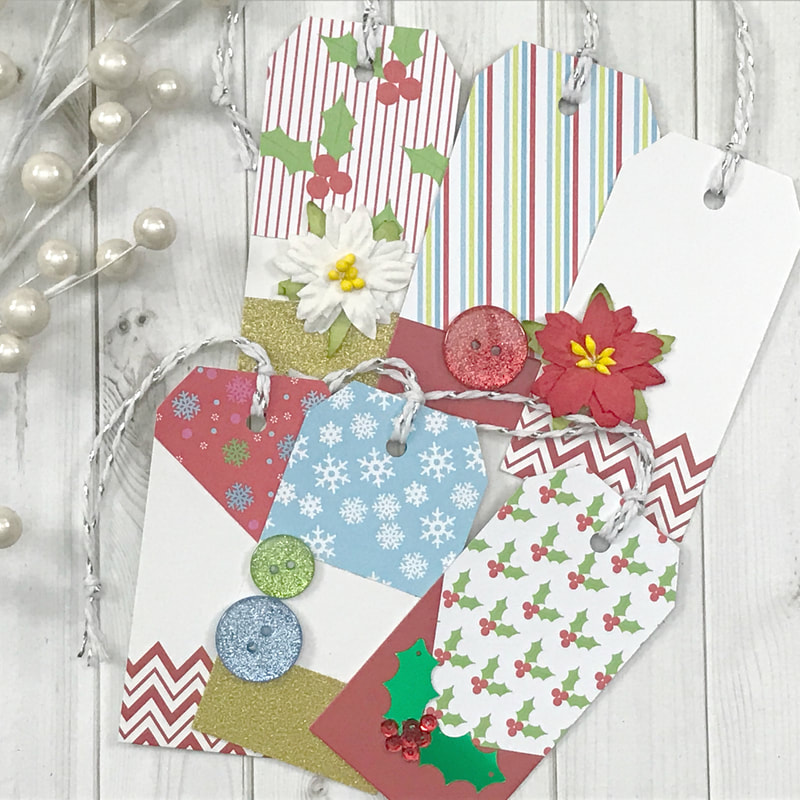 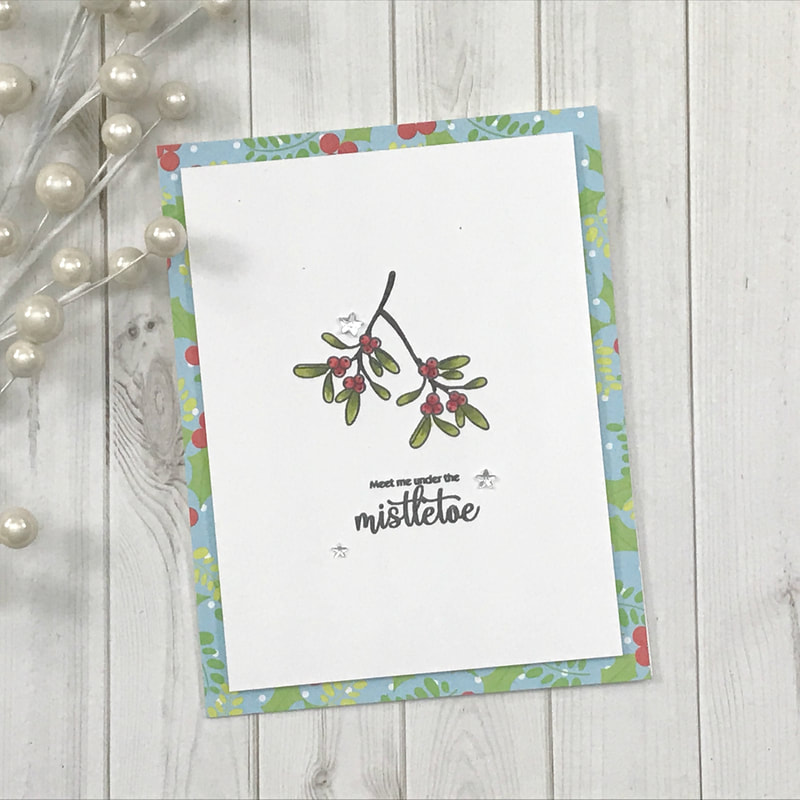 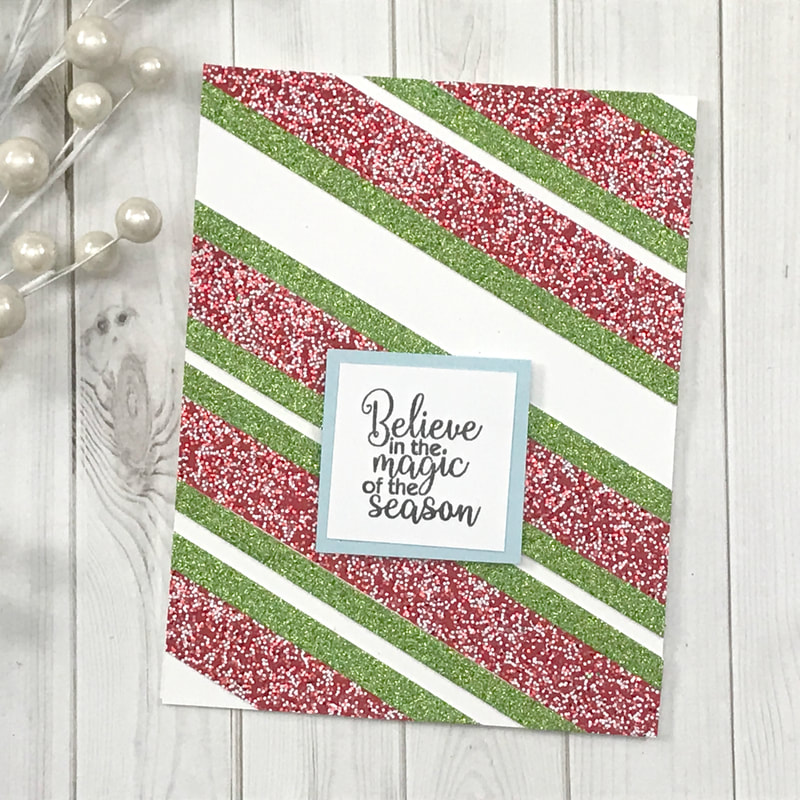 Pink and Main Christmas Box 2019 Be Merry NOTE - this is not part of the Crafty Courtyard Subscription - limited numbers of boxes available, and when they are gone, they are gone! SO GET YOURS TODAY! For more crafty details as well as a full list of supplies used for this project, click on the video below! When you are done watching the video, and want to see more, CLICK HERE to go to my YouTube Channel ... Don’t’ forget to LIKE and SUBSCRIBE to my channel! Always Remember... Be Inspired, ENJOY, LAUGH and ALWAYS BE CREATIVE! ~ Desiree
0 Comments
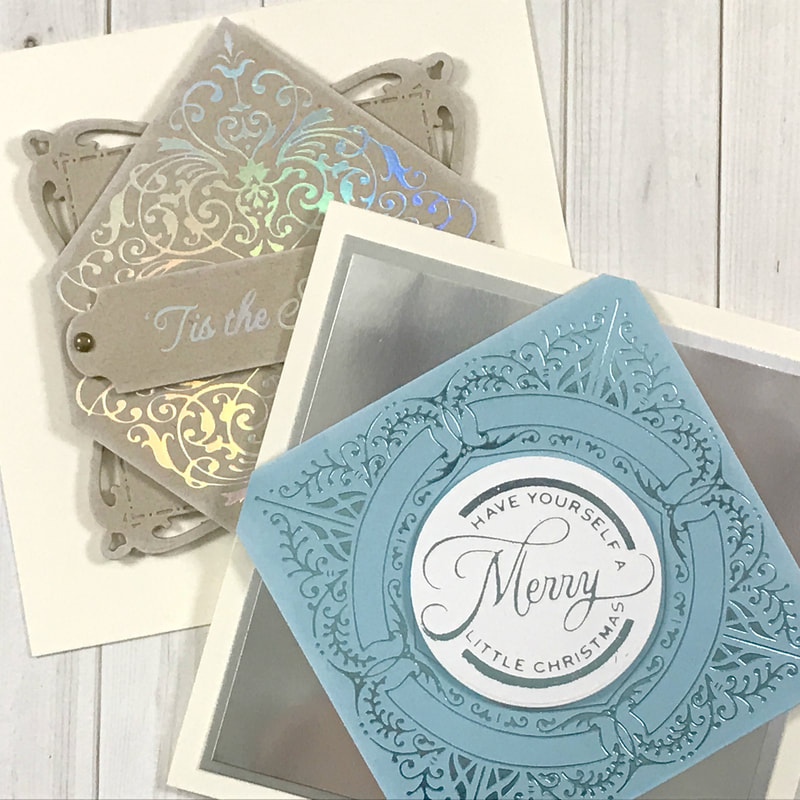 Hello Everyone! Here with Spellbinders and creating two Holiday card using the Glimmer Hot Foil System and plates from the Glistening Holiday Collection! Layers, foil and script oh my! Foiling your cards is the quickest way to create an elegant but simple card in no time! I find myself always choosing mirror card stock to accent the foiled image of my card. Tans, Ivory, Blues and Silver were in order for these designs. Each card measures 6 inches x 6 inches and are a perfect size to show off the detail in these designs. 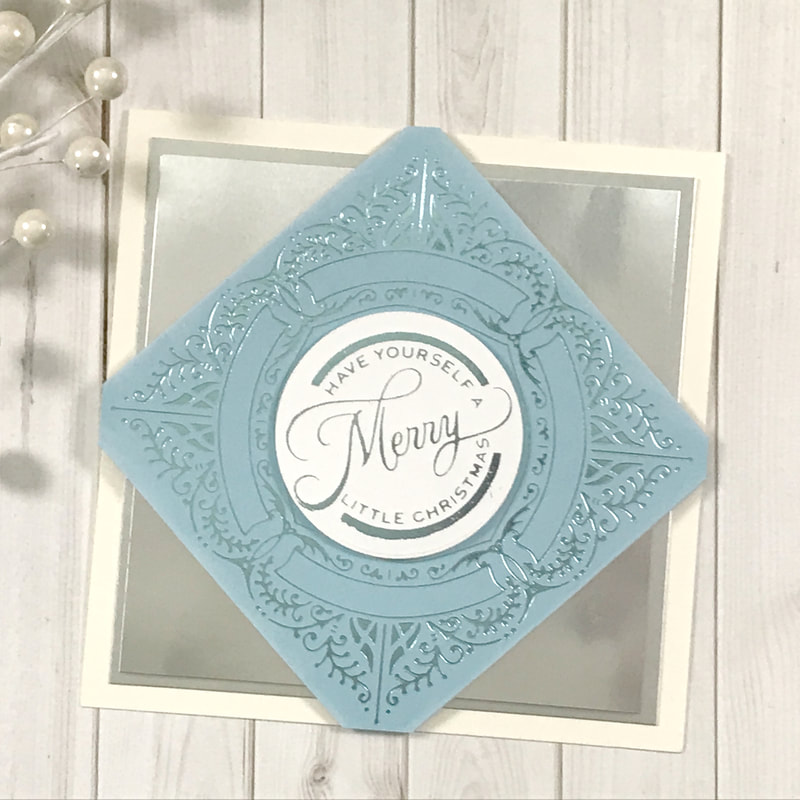 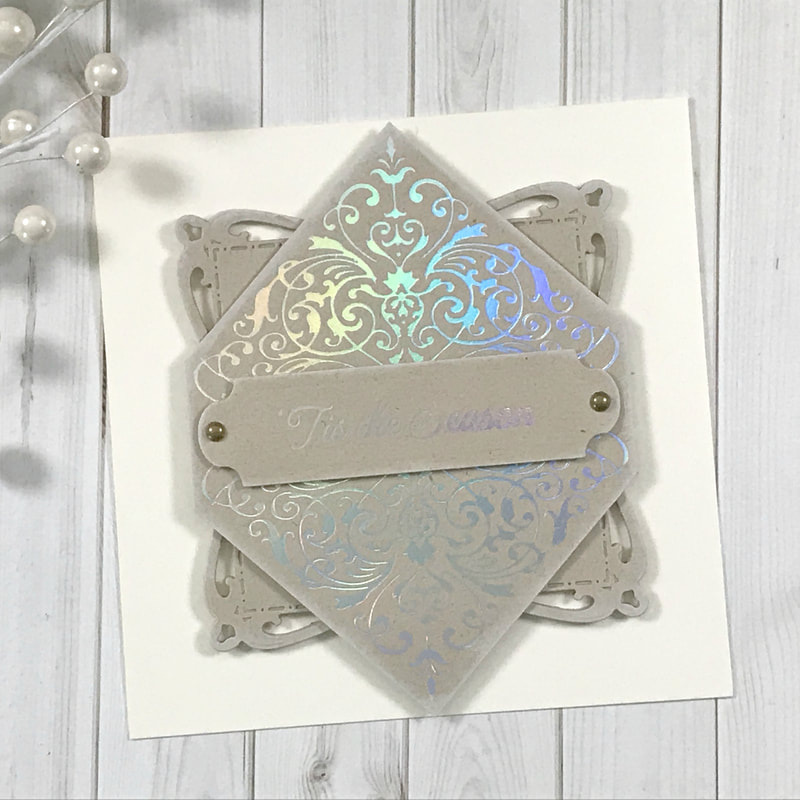 For more crafty details as well as a full list of supplies used for this project, click on the video below! When you are done watching the video, and want to see more, CLICK HERE to go to my YouTube Channel ... Don’t’ forget to LIKE and SUBSCRIBE to my channel! Always Remember... Be Inspired, ENJOY, LAUGH and ALWAYS BE CREATIVE! ~ Desiree 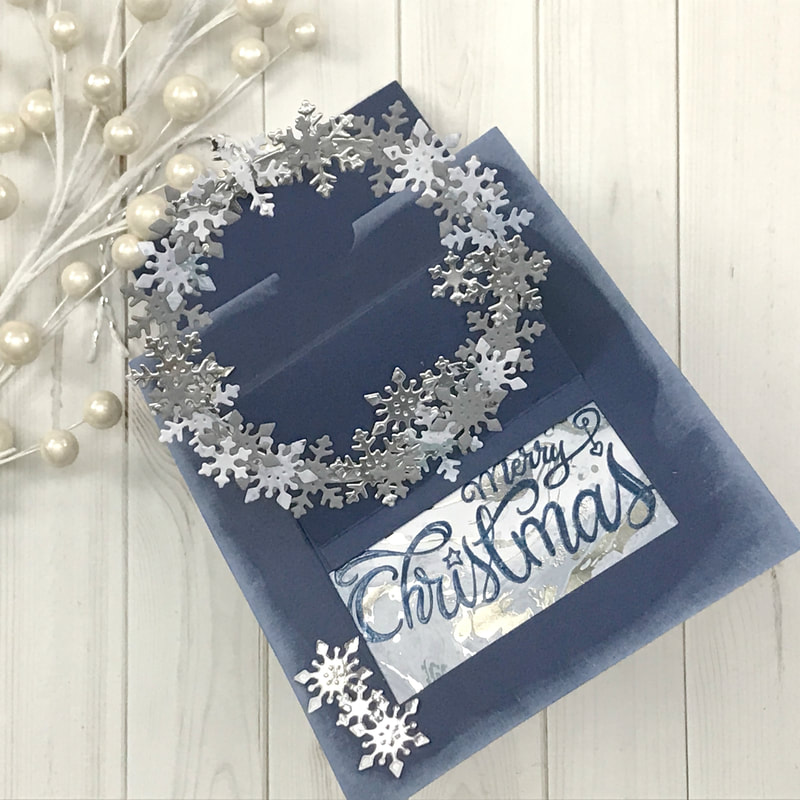 Hello Everyone! Here with Spellbinders again making a slide card using their Large Die of the Month from June 2019! This die set makes creating a slide card super simple and quick for any celebration! I was able to dig into my scraps and pull out colors that were perfect to create a snowflake wreath! Blues, greys, and silvers were chose to being this slider card to life. I due cut all my pieces and used my double sided tape to adhere the set together. Since this is an interactive card I made sure I chose a bright thread so the recipient knew to pull to activate the slider mechanism.  For more crafty details as well as a full list of supplies used for this project, click on the video below! When you are done watching the video, and want to see more, CLICK HERE to go to my YouTube Channel ... Don’t’ forget to LIKE and SUBSCRIBE to my channel! Always Remember... Be Inspired, ENJOY, LAUGH and ALWAYS BE CREATIVE! ~ Desiree  Hello Everyone! I am here today with Spellbinders and using one of the their Past Club Kit from their Large Die Subscription! Best part? These are available for purchase! So this is their Pop-Up Die Set released for March 2019! Spring flowers and bright colors came to mind when I first saw this set, but we are in Fall! So what did we do, turned it into a Halloween Themed card in just minutes and only by changing the colors! Come see how easy it can be to stretch your dies! For more crafty details as well as a full list of supplies used for this project, click on the video below! When you are done watching the video, and want to see more, CLICK HERE to go to my YouTube Channel ... Don’t’ forget to LIKE and SUBSCRIBE to my channel! Always Remember... Be Inspired, ENJOY, LAUGH and ALWAYS BE CREATIVE! ~ Desiree 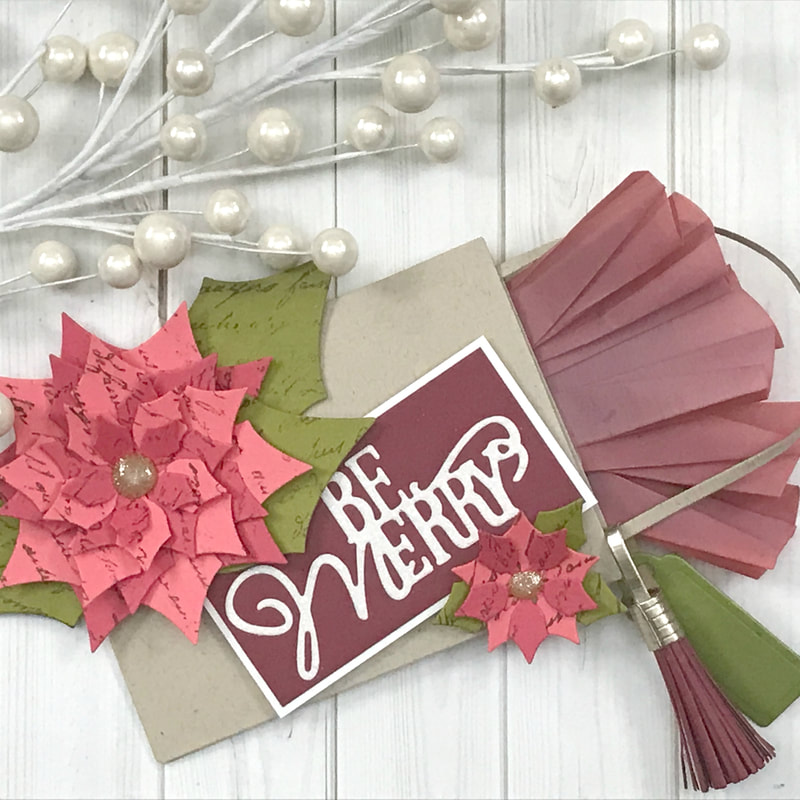 Hello Everyone! Here with Spellbinders today creating a Holiday Gift Card Holder using their Large Die of the Month from April! Hold your gift cards in style for occasion coming this year! I styled this holder for the upcoming holiday season using scraps from my stash to create the holiday theme. I used a script stamp to add texture to the card stock for my poinsettia flowers. To create the tissue paper I pulled some vellum and added some Distress Oxide ink and then wiped the excess away. This is a great way to change the color of your paper if you do not have many colors already! Assembly was easy and I used my double sided tape to ensure it held together. 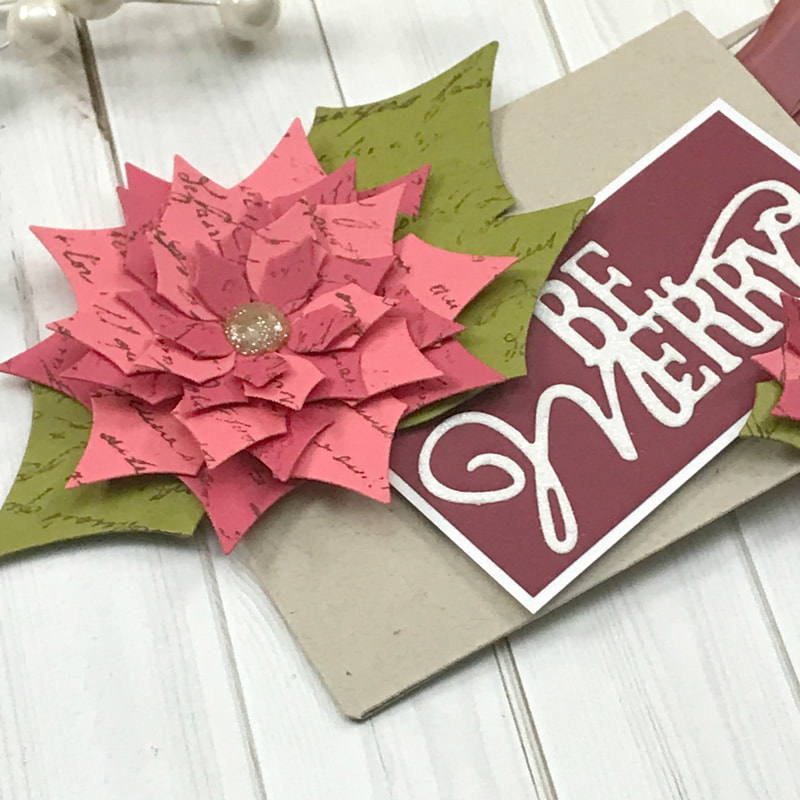 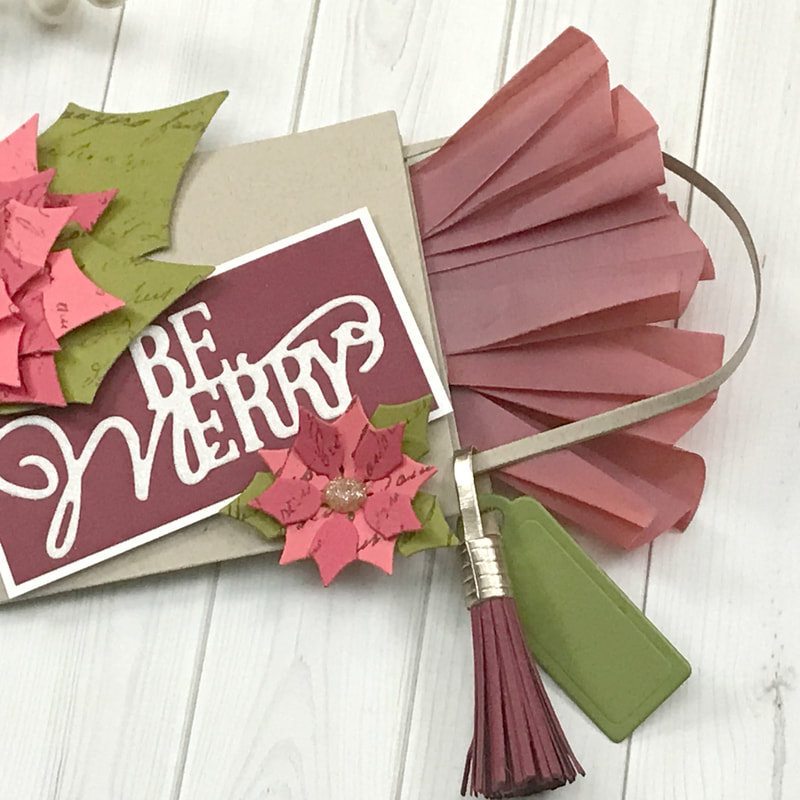 For more crafty details as well as a full list of supplies used for this project, click on the video below! When you are done watching the video, and want to see more, CLICK HERE to go to my YouTube Channel ... Don’t’ forget to LIKE and SUBSCRIBE to my channel! Always Remember... Be Inspired, ENJOY, LAUGH and ALWAYS BE CREATIVE! ~ Desiree |

Getting Inky, suffering paper cuts, cutting using metal dies and stamping everything... These are just some of the fun and mischievous ways together we will create paper art! So stay and be motivated and inspired! ...and let me know what inspires your creativity!


Designer/Owner/Creator - Desiree
Well, hello there everyone! My name is Desiree Kuemmerle and I live in Lansdale, PA with the hubs of over 20 years and our furry bot Max! I am fluent in Crafting, a Master Paper Manipulator and a violator of all that makes sense...
Since about the time I spoke my first word, I’ve been an avid crafter alongside my mom and sister. You name the craft and I’ve probably bought it, collected it, tried it and finally stored it. Right now, getting Inky, suffering paper cuts, cutting with metal dies and stamping everything, whether it moves or not makes me smile and I must pass that along to everyone I know and don’t know! 
Inspiration Crafty Designs for...
 
DESIGN TEAM
Just a few Great places for all your CRAFTY needs!!!
 
Old Posts Never Die
November 2022
Search by Categories
All
|
 RSS Feed
SEARCH WEBSITEServiceslet's connect SOCIALLY! |
|
copyright!All content and designs included on my sites, social media and e-commerce webpages (i.e. Etsy, Facebook, ONLINE Courses and Website Store) are under COPYRIGHT © Desiree Kuemmerle, Include a Thank You, Desiree Tangles with Paper and Desiree Kuemmerle, CZT. Original artwork and designs are shared for your personal creations and inspiration only, unless otherwise stated by Desiree Kuemmerle.
© COPYRIGHT 2017-2024. by Desiree Tangles with Paper and (a.k.a.) Include a Thank You ...and then some! - Desiree Kuemmerle ALL RIGHTS RESERVED.
Include a Thank you
|