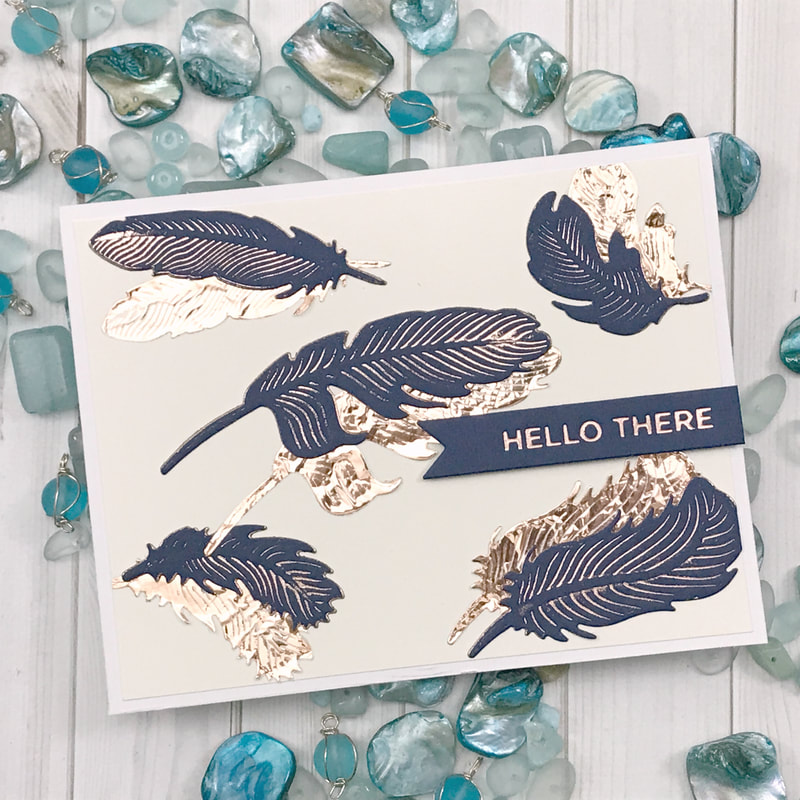
 Hello Everyone! I am here today with a project I made using the Spellbinder Glimmer Hot Foil System! I came across this technique while I was putting together my Guest Design Spot!... Now I am sure someone else has done this but I thought this was a great use of the this system! As I keep working with this machine I find new ways to create with it! 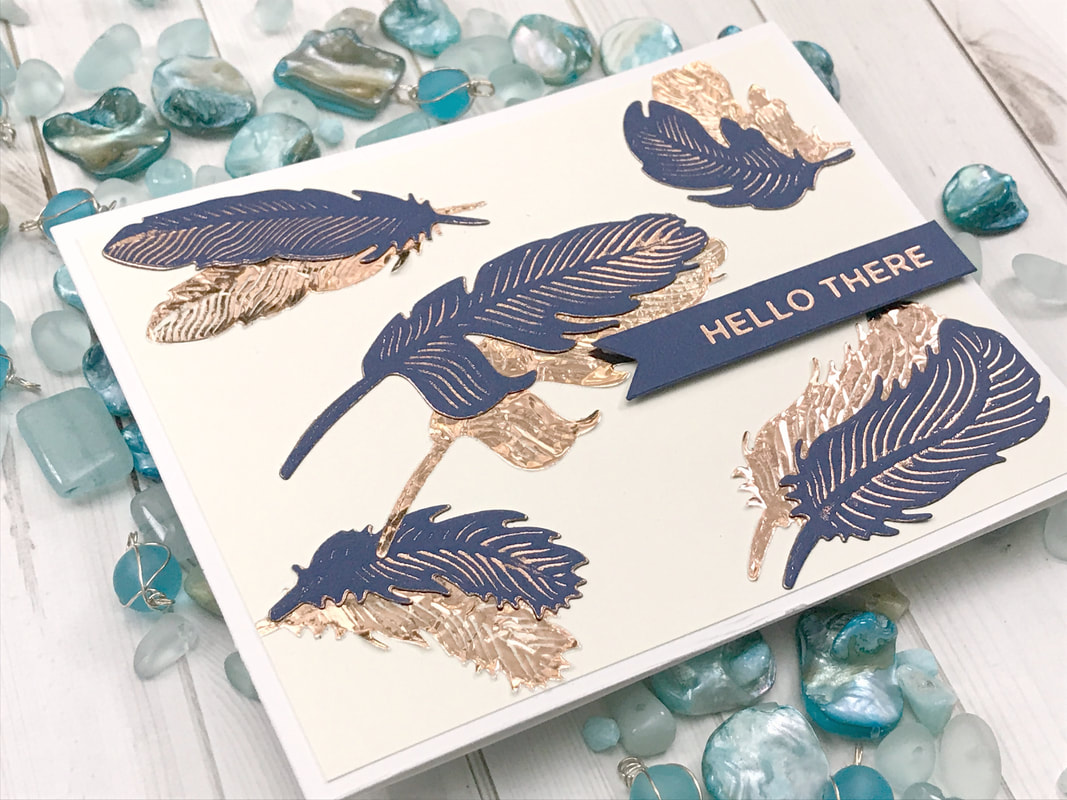 For this project I decided to use our regular dies from Spellbinders! Now these are called Feathers and they are part of their Shapeabilities line! These have great embossing lines within the die and these are the dies that will work best for this technique! 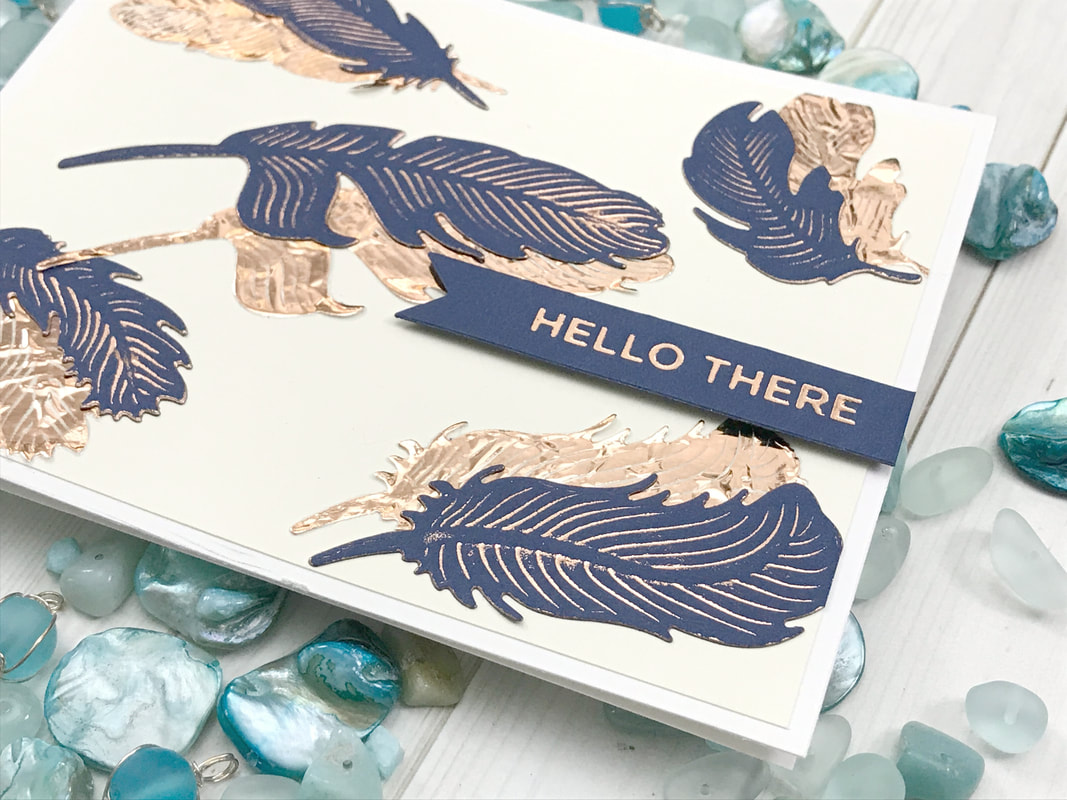 I first foil the images making sure the dies stay in place and then I set my cutting plates so I can die cut the images out! This way I will get two cut outs, the first from my card stock and the second from the foil itself! This is definitely something that is easier to understand if we watch the video... i just know I will confuse everyone if I try to explain, here, LOL... Some of the products I used for the project today! Spellbinders Glimmer Hot Foil System Spellbinder Platinum 6 Die Cutting Machine Spellbinders Shapeabilities – Feathers Glimmer Foil – Blush Watch the video below for all the crafty details! When you are done watching the video, and want to see more, CLICK HERE to go to my YouTube Channel ...
Don’t’ forget to LIKE and SUBSCRIBE to my channel! Always Remember... Be Inspired, ENJOY, LAUGH and ALWAYS BE CREATIVE! ~ Desiree
0 Comments
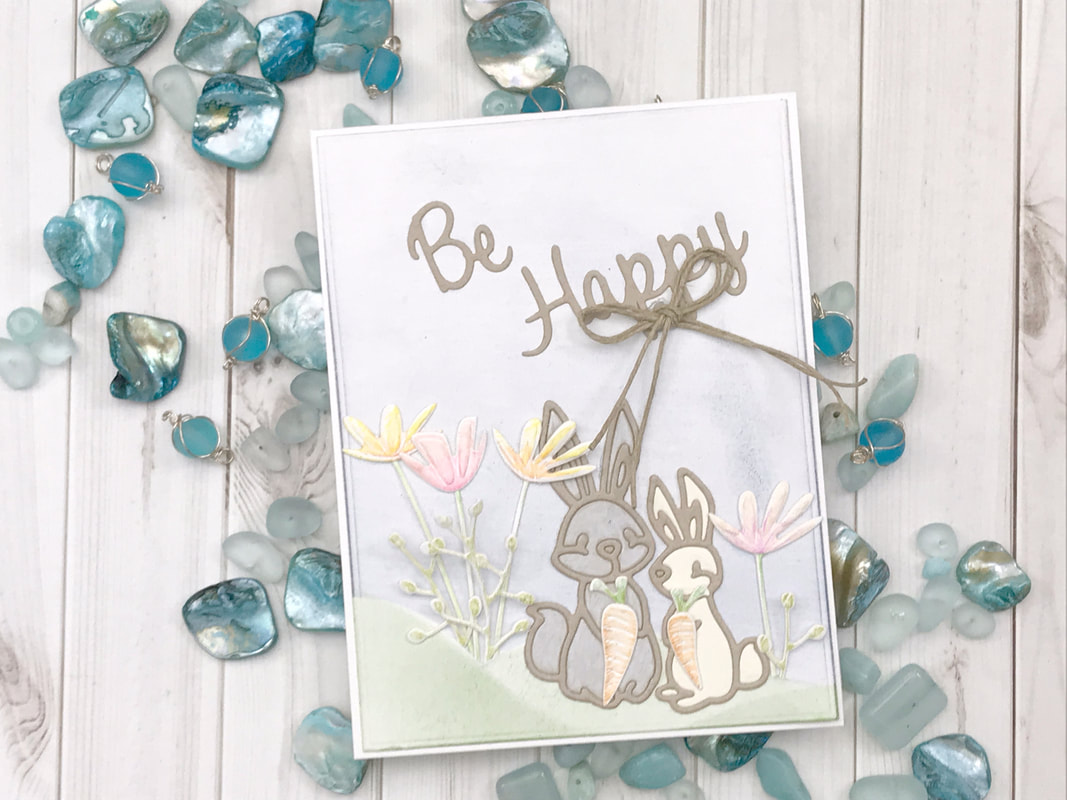 Hello Everyone! Today I am creating with Spellbinders and their Small Die Kit of the Month for March! This is perfect to help me pull in the Spring Time feeling, and we need it in my area desperately! So many dies and so many possibilities... whether you need to create an Easter or Floral card, this is die set is a must have! 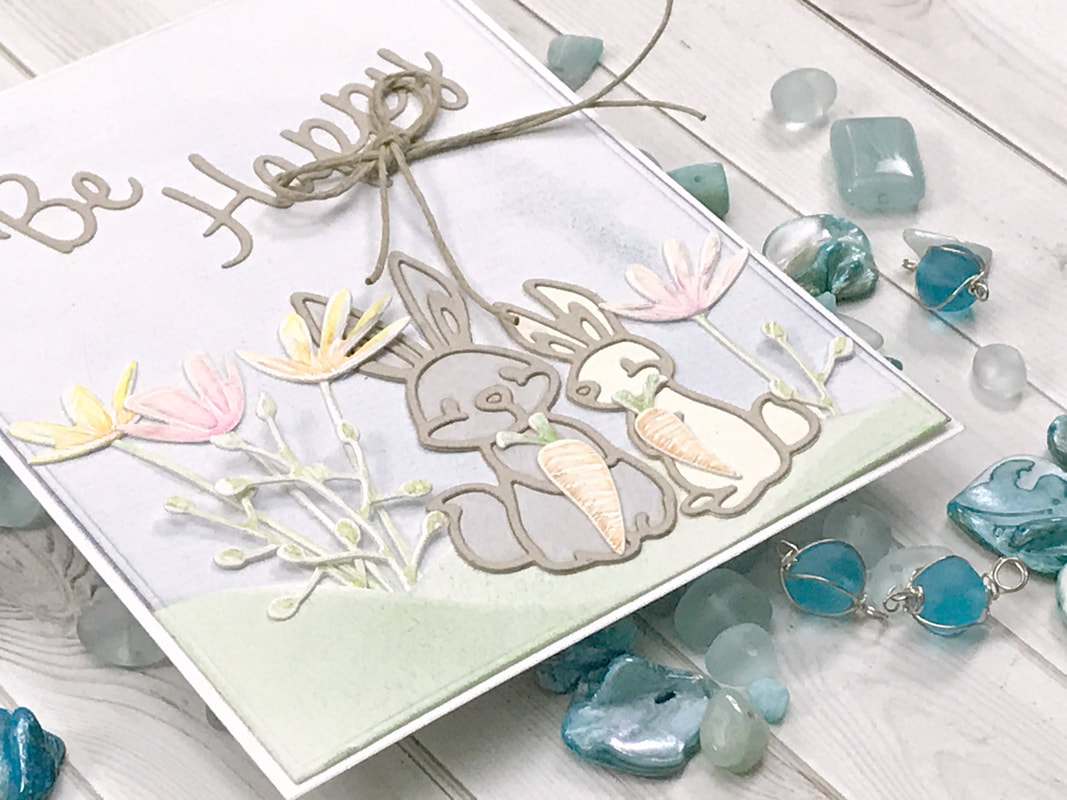 I started by creating an impression of the dies i was going to use for my card design. After I ran them through my die cutting machine I used the side of my colored pencils an added just a touch of color... 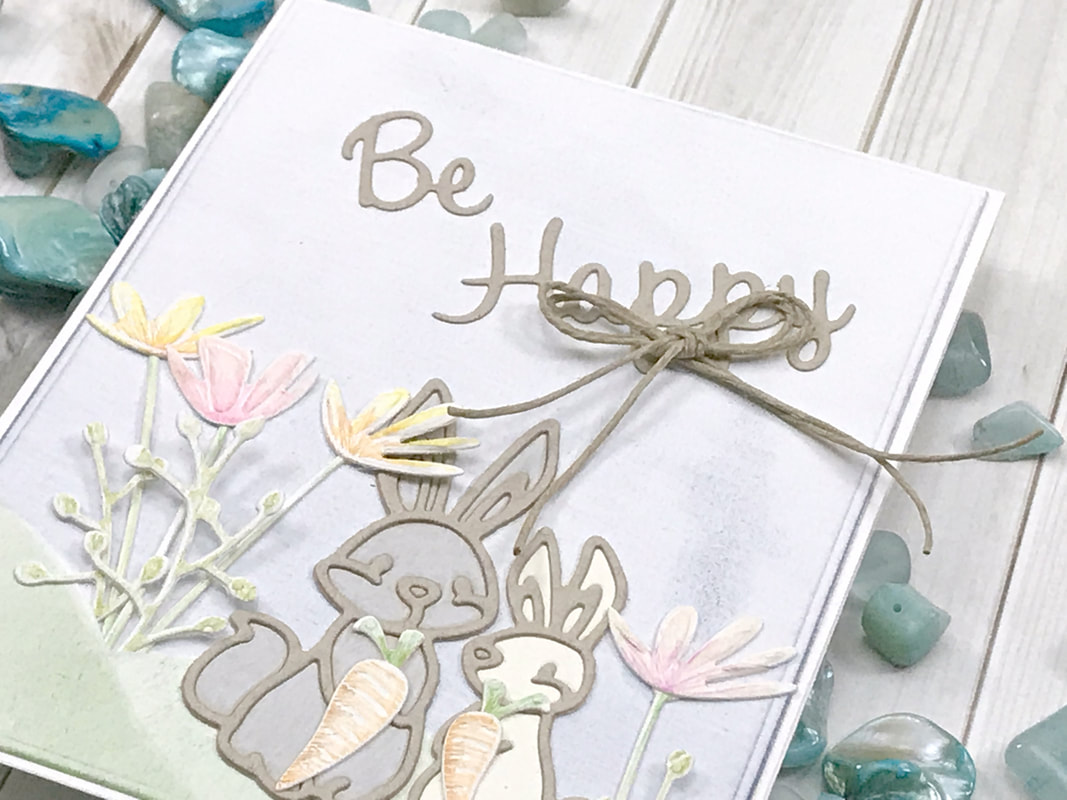 This just gives a different effect using your colored pencils! I then ran these panel through my die cutting machine again, but this time I cut out the images... Placed them on my panel and secured them using my liquid glue... Added that bow for a final touch! If you are interested in this or any of their Kits, just click below! Spellbinders All Clubs for the Month Spellbinders Small Die Club Spellbinders Large Die Club There are also Value Clubs, were any of their kits can be combined together at a better value! Spellbinders Value Clubs Make sure you check out the links below for all the inspiration you would ever need! Spellbinders Blog Spellbinders Inspirational Gallery Spellbinders Inspirational Videos To see all the craft details, just click on the video below!... ENJOY! When you are done watching the video, and want to see more, CLICK HERE to go to my YouTube Channel ...
Don’t’ forget to LIKE and SUBSCRIBE to my channel! Always Remember... Be Inspired, ENJOY, LAUGH and ALWAYS BE CREATIVE! ~ Desiree 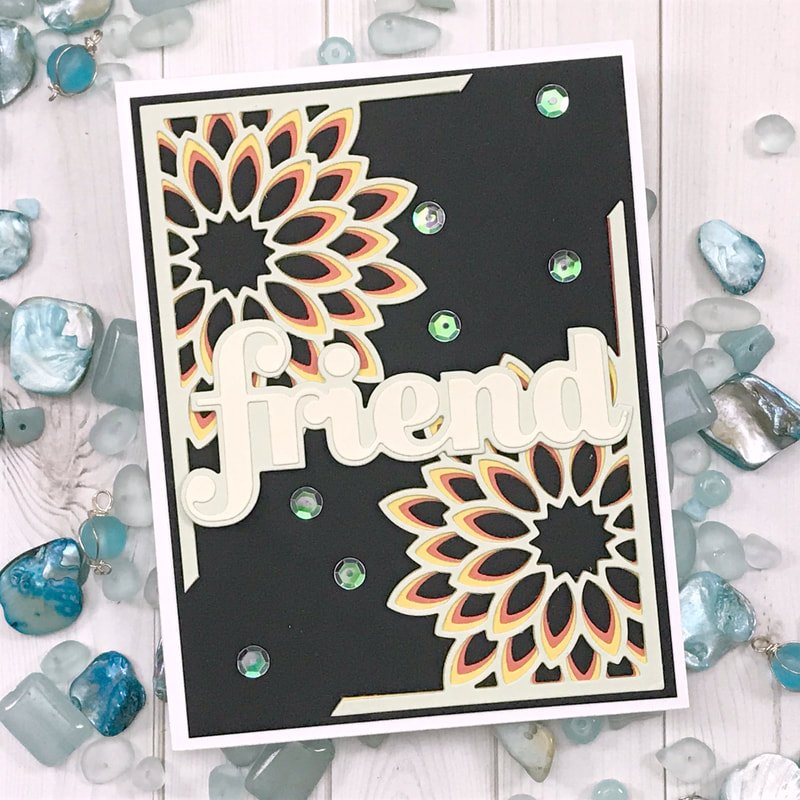 Hello Everyone! Today I am going to work with the Dahlia Mini Frame Layering Die set, but I want to stretch this die across my card base! So let’s see just how I do this, but trust me, you only need a pair of scissors! We want to start our project by cutting each layer of the Dahlia Mini Frame twice, for a total of 6 panels. Before we start attaching our layers together you want to cut into two open corners on your bottom layer. Once you have your bottom layer cut, you can now attach your other two. By cutting the first layer you now have a guide where to cut after your layered panel is built and ready to be applied to your card base. 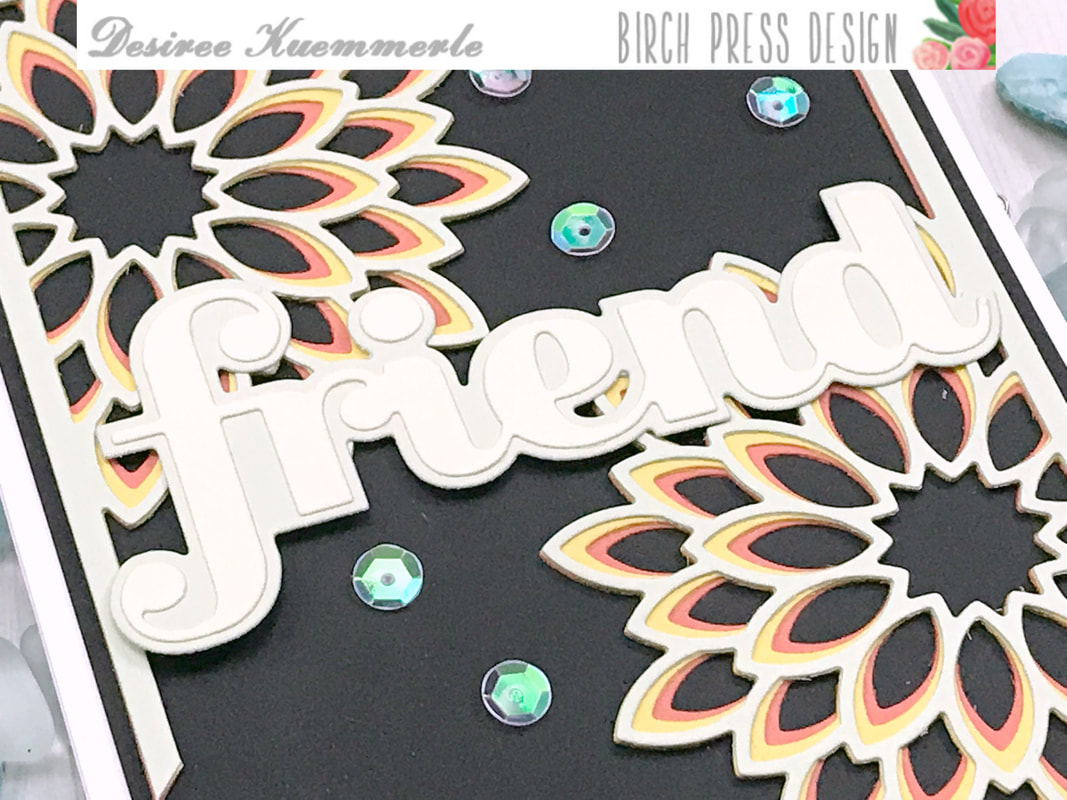 Before we put out card together, let’s quick layer our sentiment. I chose to use the Big Friend Sugar Script Die. I used one of my card stock from my Dahlia set and Ivory, very subtle, and yes the video does not do this card any justice! LOL… Now let’s build our card…  I cut a piece from black card stock that measured 4 inches x 5 ¼ inches for my design base. I adhered one of my layered panels in the upper right corner and the other in the bottom right hand corner. Remember this Layering Die was already set to be around 3 inches x 4 inches approximtely… Just by cuting out a corner we can now extend this design across a card base. With each corner filled with my layered panels, I decided to place my sentiment across each of them towards the center. I added a few iridescent sequins just for a little bling! Here are a few of the products used for this project... Birch Press Design – Dahlia Mini Frame Layering Die Set Birch Press Design – Big Friend Sugar Script Die Click the video below to make sure you do not miss the crafty details... When you are done watching the video, and want to see more, CLICK HERE to go to my YouTube Channel ...
Don’t’ forget to LIKE and SUBSCRIBE to my channel! Always Remember... Be Inspired, ENJOY, LAUGH and ALWAYS BE CREATIVE! ~ Desiree 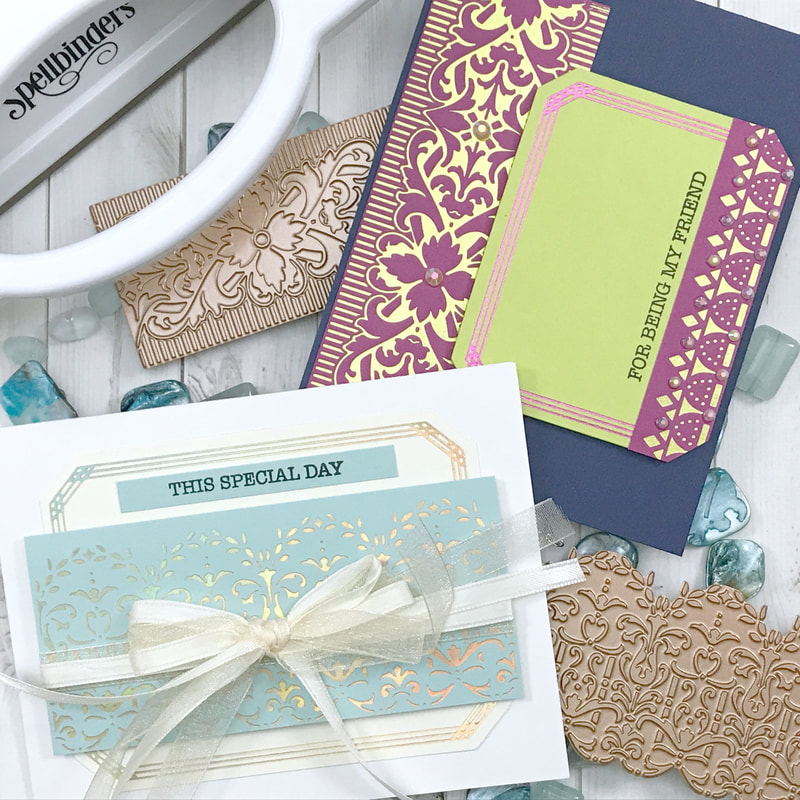 Hello Everyone! I back again as a Guest Designer for Spellbinders today and I am showcasing the Gilded Age Glimmer Collection by Becca Feeken for the Glimmer Hot Foil System! The Glimmer Hot Foil System is becoming a major staple in my card making arsenal! I am finding more ways to create with this system every time I turn it on! Wait until you see! LOL My projects today I will feature a couple plates from the collection... the Gilded Trimmings and Lace Flippery boarder plates and a wonderful Gilded Nested Rectangle Frame and there is a matching Die set to match! Part of this collection are new colors that are available in the foil line as well! For my two projects today, I was pulled in two directions… soft and victorian and bold and regal!  For my first project I chose the Lace Flippery plate and the aura foil on an aqua card stock. Once my image was foiled, I used my paper trimmer to cut my panel down and wrapped organza and satin ribbon around and added a bow on top. I also used the Gilded Nested Rectangle plates as a backdrop in Blush foil and die cut it using the nested frame dies that are available. Layered these using some fun foam and added my sentiment just above my lace panel. 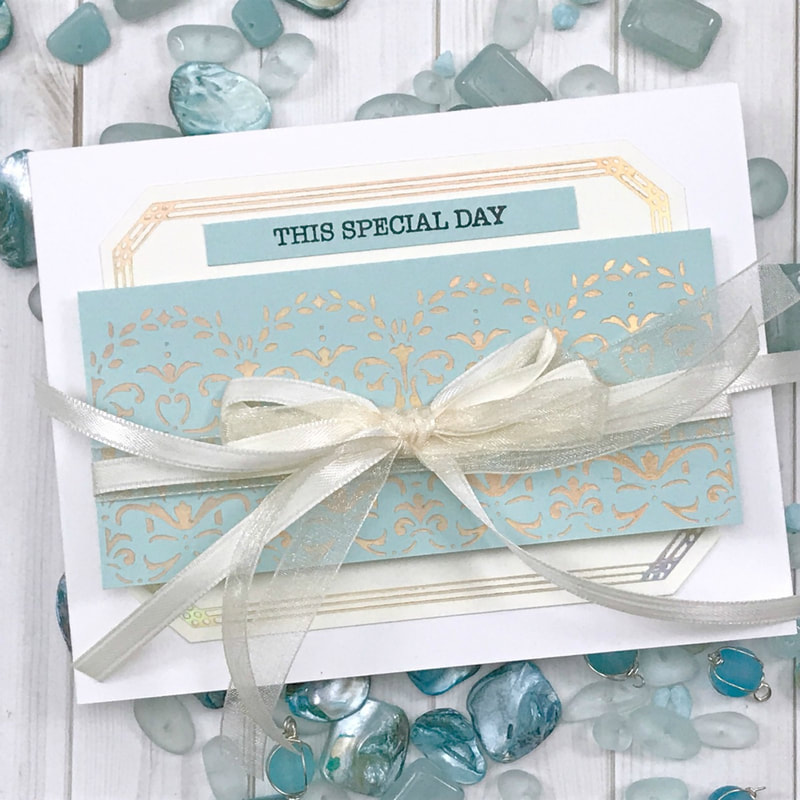 For my second card I knew I wanted bold and bright colors! I fell in love with the Citrine and Bright Pink foils and used the same colors for my card stock. The Gilded Trimmings has two border plates with a bold design for each and they were perfect for my panels. I foiled my panels using the Bright Pink on my light green card stock and the Citrine foil on bright pink card stock. I foiled and die cut a smaller frame from the Gilded Nested Rectangle set so it could hold the sentiment chosen. I was seeing a journal card there, LOL…. I used a navy blue card base to set my panels to add to the regal look I was going for! Added a few ivory gems for an added touch. 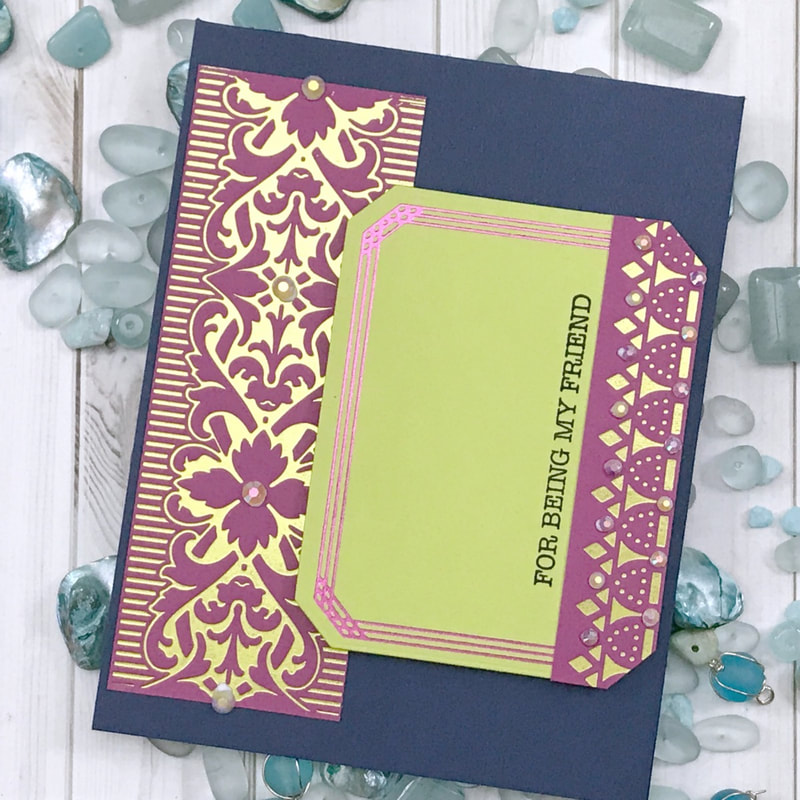 The Glimmer Hot Foil System comes with everything you need to immediately start creating beautiful paper crafting projects and is a perfect addition to your crafting space! Here are some of the products used for these projects... S4-1013 Gilded Nested Rectangle Set GLP-103 Gilded Nested Rectangle Glimmer Set GLP-121 Gilded Trimmings GLP-128 Gilded Lace Flippery GLS-001 Glimmer Hot Foil System GLF-027 Aura Foil GLF-016 Citrine Foil GLF-017 Bright Pink Foil GLF-026 Blush Foil PE-100 Spellbinders Platinum 6 Die Cutting Machine Click the video below so you don't miss all the craft details! Make sure you stay tuned for more beautiful creations for Spellbinders and check out their gallery of inspiration by their wonderful team of designers. When you are done watching the video, and want to see more, CLICK HERE to go to my YouTube Channel ...
Don’t’ forget to LIKE and SUBSCRIBE to my channel! Always Remember... Be Inspired, ENJOY, LAUGH and ALWAYS BE CREATIVE! ~ Desiree  Hello Everyone! I am back today with another Kit of the Month program for Spellbinders! This one is designed specifically for their Glimmer Hot Foils System! As I keep using this system the quicker and easier it becomes to make elegant and beautiful cards that would make any sentiment stand out a little more! 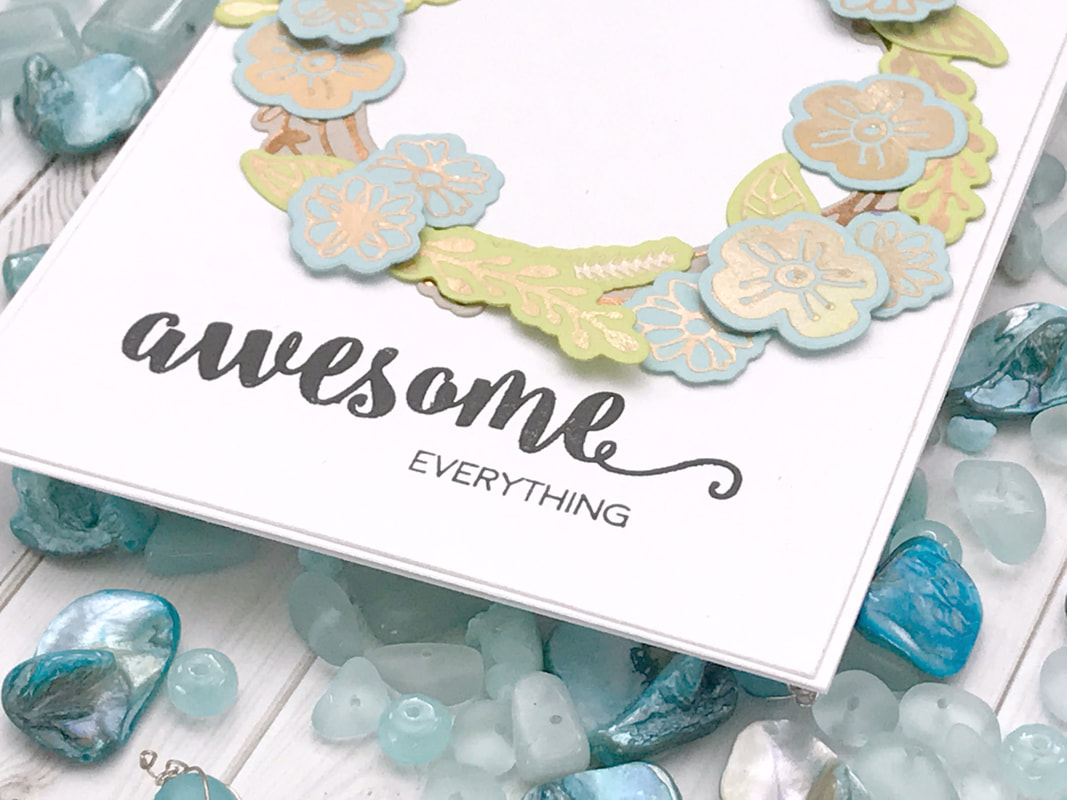 What I am loving about this kit is there are cut out dies for every glimmer plate. They have removed the fear of not having your image straight on your card base! These images are great for any occasion and perfect for any card you need to make! Here are the links to the products I used or if you want to see this or other Kit of the Month programs Spellbinders has to offer! Spellbinders Monthly Club Kit Page Spellbinders Monthly Glimmer Kit Spellbinders Glimmer Hot Foil System Glimmer Foil – Copper Glimmer Foil – Aura Spellbinder Platinum 6 Die Cutting Machine Make sure you click on the video below to see all the crafty details! When you are done watching the video, and want to see more, CLICK HERE to go to my YouTube Channel ...
Don’t’ forget to LIKE and SUBSCRIBE to my channel! Always Remember... Be Inspired, ENJOY, LAUGH and ALWAYS BE CREATIVE! ~ Desiree |

Getting Inky, suffering paper cuts, cutting using metal dies and stamping everything... These are just some of the fun and mischievous ways together we will create paper art! So stay and be motivated and inspired! ...and let me know what inspires your creativity!


Designer/Owner/Creator - Desiree
Well, hello there everyone! My name is Desiree Kuemmerle and I live in Lansdale, PA with the hubs of over 20 years and our furry bot Max! I am fluent in Crafting, a Master Paper Manipulator and a violator of all that makes sense...
Since about the time I spoke my first word, I’ve been an avid crafter alongside my mom and sister. You name the craft and I’ve probably bought it, collected it, tried it and finally stored it. Right now, getting Inky, suffering paper cuts, cutting with metal dies and stamping everything, whether it moves or not makes me smile and I must pass that along to everyone I know and don’t know! 
Inspiration Crafty Designs for...
 
DESIGN TEAM
Just a few Great places for all your CRAFTY needs!!!
 
Old Posts Never Die
November 2022
Search by Categories
All
|

 RSS Feed
SEARCH WEBSITEServiceslet's connect SOCIALLY! |
|
copyright!All content and designs included on my sites, social media and e-commerce webpages (i.e. Etsy, Facebook, ONLINE Courses and Website Store) are under COPYRIGHT © Desiree Kuemmerle, Include a Thank You, Desiree Tangles with Paper and Desiree Kuemmerle, CZT. Original artwork and designs are shared for your personal creations and inspiration only, unless otherwise stated by Desiree Kuemmerle.
© COPYRIGHT 2017-2024. by Desiree Tangles with Paper and (a.k.a.) Include a Thank You ...and then some! - Desiree Kuemmerle ALL RIGHTS RESERVED.
Include a Thank you
|